Best Metal Detector Guide [Updated for 2022]
Published by Carolyn Yohannes on 01/01/21
Being one of the oldest and largest metal detector retailers in the world, and serving as many customers as we do means we get a lot of questions. The question we get asked more often than any other is, “What are the best metal detectors on the market today?”
Unfortunately, there’s not a simple answer to that question. There are many “best detectors” because there are so many different types of metal detecting.
We’ve created this buying guide to answer the question as completely as we can. Along the way, we will tell you about some of the various criteria you should consider when buying a metal detector, and we’ll give you some of the main factors to consider, depending on the type of metal detecting you plan to do.
Table of Contents
Terminology & definitions
Evaluation criteria for this buyer’s guide
Best metal detector for coins, rings & jewelry
Best metal detector for relic hunting
Best metal detector for gold
Best metal detector for saltwater & beach hunting
Best metal detector for freshwater
Best all-purpose metal detector
Wrap up
Buyer’s Guide Terminology & Definitions
Like every great hobby, metal detecting is an activity that is filled with special words that outsiders may have a hard time understanding. Here we will define some of the words you may not be very familiar with.
Metal detecting experts, feel free to skip ahead to the next section.
- Ferrous: Metals that contain iron. Non-ferrous metals are metals that are not magnetic, like brass, gold, silver, nickel, tin, and lead.
- Frequency: Frequencies vary on metal detectors and the different frequencies are used for different types of detecting. The frequencies are measured in Kilohertz and measure the number of magnetic fields sent to the ground. Different metals react to different frequencies based on the characteristics and conductivity of that metal.
- Multi-Frequency: Many hobby detectors use only one frequency. Some detectors use multiple frequencies or a range of frequencies at the same time so you can find a wider range of targets using one detector. Minelab’s Equinox 800, Vanquish 540, XP’s Deus II and Nokta Makro’s The Legend are all examples of detectors that use multi-frequency technology.
- Mineralization: The amount of iron and salt in the ground. Examples of mineralized ground include black sand on beaches (from the iron), redness in the dirt (iron), and the salt in the sand on saltwater beaches.
- Interference: Anything with an electromagnetic field, like cell phones or power lines, can interfere with the detector’s signal.
- Control box: Contains the controls, speaker, batteries, and processor of a metal detector.
- Search coil: This is what “sees” the metal in the ground. Different search coil sizes and shapes perform differently. Generally speaking, smaller coils are most sensitive while larger coils can penetrate deeper underground.
- Discrimination: You can filter out different types of metal or objects by adjusting your settings.
- Notch: One of your discrimination segments. You might say “notch out that segment” which means to turn off that segment so your detector does not pick up that segment. You might notch-out or eliminate trash so that way you don’t pick up as many trash signals from pull-tabs or can slaw.
- Ground balance: Adjustments made to the detector for different types of soil and mineralization.
- Target separation: How well a detector identifies targets that are close to one another.
Evaluation Criteria When Choosing The Best Metal Detector
There isn’t one metal detector that’s better than all the rest, although there are a few stand-out best metal detectors in multiple categories. This buyer’s guide for the best metal detectors will examine the specific features that make for a good detector in a number of those categories. We will make recommendations based on many category-specific criteria, as well as some criteria that are common between several categories.
We will examine factors like:
- Weight
- Size
- Ergonomics
- Ease of use
- Durability
- Reliability
- Price point
- Customer ratings and reviews
- Warranty length
- Weatherproofing
- Waterproofing
For each category we evaluate, we will recommend three different detectors:
- Best of the best
- Best for beginners
- Best value
In addition to sharing our expertise in each of these categories, we asked our customers to share their opinions as well. We surveyed our customers to find out which detector they consider to be one of the “best metal detectors” in each category. You can see their responses at the end of each category. Some categories had a clear-cut favorite among our customers, but some categories were not so cut and dry. Presenting this data alongside our opinion gives you yet another way to evaluate machines in each category.
Whether you’re just starting out or are a seasoned professional, this guide will help you make an informed decision on which metal detector is the best fit to become your next detector. After all, once you’ve been bitten by the metal detecting bug, there is no such thing as owning just one metal detector.
What Is The Best Metal Detector for Coins, Rings, and Jewelry?
Using a metal detector to search for coins has a fun name: coin shooting. Whether you’re coin shooting or looking for rings or other types of jewelry, we recommend searching areas where lots of people visit on foot. Parks, beaches, schools, churches, even sports complexes, and bleachers are great places to look for these items.
Some of the very best locations for coin shooters are places that are abandoned today but were very busy in the past.
When you shop for a metal detector for coins, rings, or jewelry, choose one that’s easy to use and has good target separation or discrimination. That allows you to filter out what you don’t want. Parks mean you have a high chance of finding coins and jewelry, but these areas also have a lot of “junk” like foil and pull tabs.
Some machines include a feature called notch discrimination, which is very useful for this kind of hunting. That allows you to pick a target and filter out everything else that is outside that target’s feedback range.
Choose a machine with a frequency of 10-15 kHz and a depth range of 6-8 inches.
Best of the Best
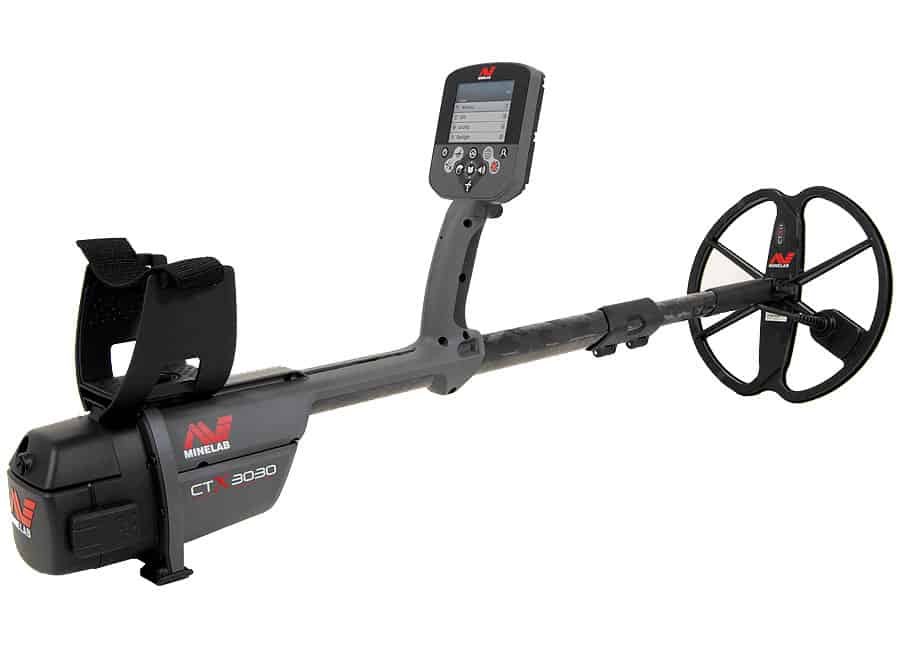
Minelab CTX-3030
This is Minelab’s highest performing all-around metal detector. It can find objects in every type of soil, including mineralized ground where gold is found. This machine has five preset search modes and is also fully customizable for more advanced detectorists. This detector works in any terrain, including the ocean and wet beach sand.
Our customers say that this detector is heavy but well-balanced. If you plan on using this for an extended period of time, a harness is available to help relieve some of the strain.
- Weight: 5.20 pounds
- Frequency: 1.5 kHz – 100 kHz
- Waterproof: Up to 10 feet
- Warranty: Three-year limited
- Programmable to fit your needs
- Most accurate target identification on the market
- GPS to track your finds
- It is heavy — over 5 pounds
- Higher price point
- Slower processor than newer detectors on the market
- “I had the pleasure of calling and talking to Kellyco … looking to upgrade... I was looking for the best land and best water machine. Your rep explained all of the differences and highly recommended the CTX-3030. One machine for both. Why buy two different machines when one detector does both? It has been the best buy I have ever made. It took a little bit to get used to the sounds but I have absolutely no regrets. Great for the days that I want to hunt both land and water. Thank you very much for the recommendation.” - Paul
Best Value
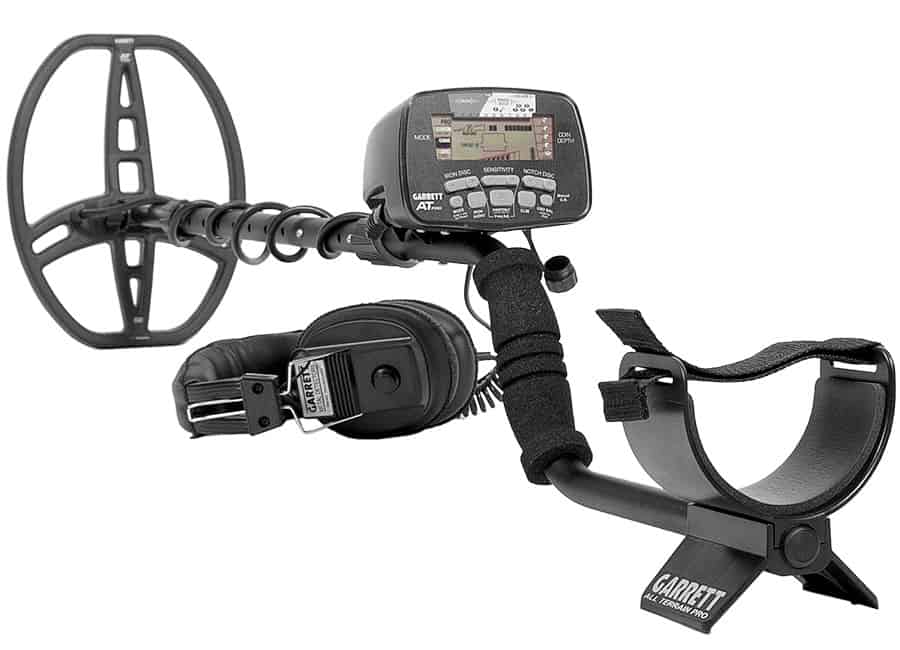
Garrett AT Pro
Like the more expensive CTX 3030, the Garrett AT Pro is fully submersible up to 10 feet. It’s an all-terrain detector that has 40 different discrimination settings to notch out various types of ferrous metals, including iron. Customers say this is one of the most versatile metal detectors out there. In the past, separate headphones were recommended, but with the upgraded MS-2 headphones you have all you need to get out detecting!
The Pro audio mode setting allows users to “hear” the properties of the target they have detected. It will emit a different tone depending on how deep an object is buried.
A digital target ID on the screen also allows users to quickly identify what the machine is detecting. The most ferrous targets are labeled between 1 and 40, with the most conductive targets — like thick silver — registering closer to 99.
Sometimes, when detecting, a larger ferrous target can be interpreted as non-ferrous (and therefore valuable). The AT Pro contains a feature called Iron Audio which, with the press of a button, can correctly identify the target.
- Weight: 3.03 pounds
- Frequency: 15 kHz
- Waterproof: Up to 10 feet
- Warranty: 2-year limited
- Waterproof up to 10 feet
- Easy to use
- Can be upgraded via Z-Lynk (Garrett’s proprietary wireless technology) for use with wireless headphones
- Limited depth and less than accurate reading in saltwater
- The Zero mode is not a true all-metal mode
- No backlight
- “I am a new first time user of a metal detector and after shopping around I decided on buying a Garrett AT Pro because of its versatility and easy to understand display. I like that it can be used in the water and is light enough to be used for hours at a time. After opening the box and getting right to detecting, I haven't been disappointed. The accessories that came with the AT Pro helped me in the field and the Relic Quest book was a very nice read. Thanks to Garrett for making such a quality machine.” - Christopher C.
Best for Beginners
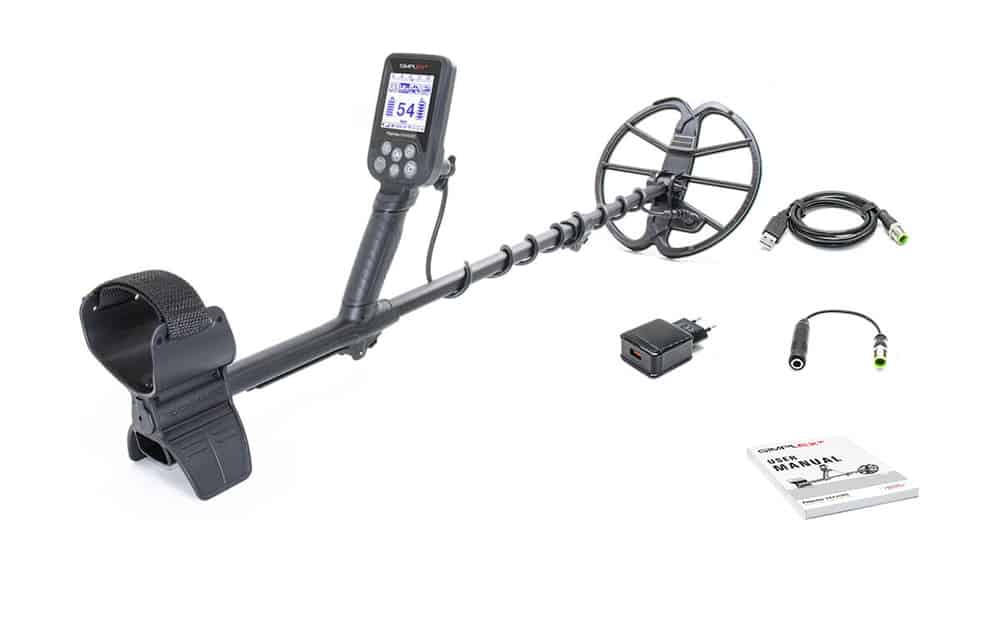
Nokta Makro Simplex
The Simplex is a simple, easy-to-use detector. It has an auto ground balancing and four preset search modes, including a beach mode. Includes an 11-inch search coil. The Simplex is fully submersible up to 10 ft. and has great lighting for nighttime and underwater use. It has great discrimination between metals. Features VLF technology.
- Weight: 2.9 pounds
- Frequency: 12 kHz
- Waterproof: Fully submersible up to 10 ft.
- Warranty: Yes
- Turn on and go
- No false signals
- Lightweight and well-balanced
- Very basic (no bells or whistles)
- Large coil
- Tones can seem amateur
- I recently tested the Simplex in an area where I have been detecting for the past three years. Without adjusting any of the settings, I took it out of the box, turned it on, plugged in the headphones and started detecting. The Simplex has an 11” coil, and I wasn’t expecting it to pick up much at this particular park because there is a lot of junk. I was very surprised at how clearly I could hear signals between trash. Within just a few hours, I found a wheat penny, a railroad spike and a brass buckle from the early 20th century. The buckle was buried 8 inches down. I have tendonitis in my elbow and swinging a detector for hours usually hurts, but after detecting for 3.5 hours, I had no issues whatsoever. This no-frills detector is an overachiever. - Carolyn Harwick
For more tips on the best metal detector for coins, read our complete guide here.
What Is The Best Metal Detector for Relic Hunting?
Relics are a big draw for metal detecting enthusiasts. There are relics scattered across the world from past wars and other historical events, and it can be very exciting to uncover a colonial buckle or part of a musket. This is where metal detecting meets archaeology and true history buffs thrive!
The best places to search for relics include churches, old homesites, and areas where people used to congregate in the past. Think about abandoned train depots, large trees in the middle of town square — commonly referred to in the hobby as a money tree — and old steamboat landings.
To be an effective relic hunter, you’ll want a tough, rugged machine, because you can wind up pretty far off the beaten path for long periods of time.
The main features prized by relic hunters include good target separation. This is important because coins can be masked by old construction materials like nails or railroad spikes. Highly effective discrimination is important because you need to kill the audio for iron targets and focus on what’s valuable.
A good relic machine should have a depth range of 12-14 inches and use a frequency between 12-15 kHz. To be effective, you’ll probably want more than one coil. Coils that are a minimum of 12 inches wide allow you to detect at deeper depths, which is important when hunting for relics. Waterproof coils are an important feature to look for as well, because you never know what terrain you’ll encounter when you’re out looking for historical locations deep in the woods.
A machine that has a true all-metal mode or zero discrimination is useful if you’re not on an old homesite because many Civil War relics tend to ring up as iron. Horseshoes, railroad spikes and shell fragments would be not be heard, for example, if your discrimination settings are too high.
Many top-performing relic machines are fairly heavy, so consider a harness or guide to help you distribute the weight.
Best of the Best
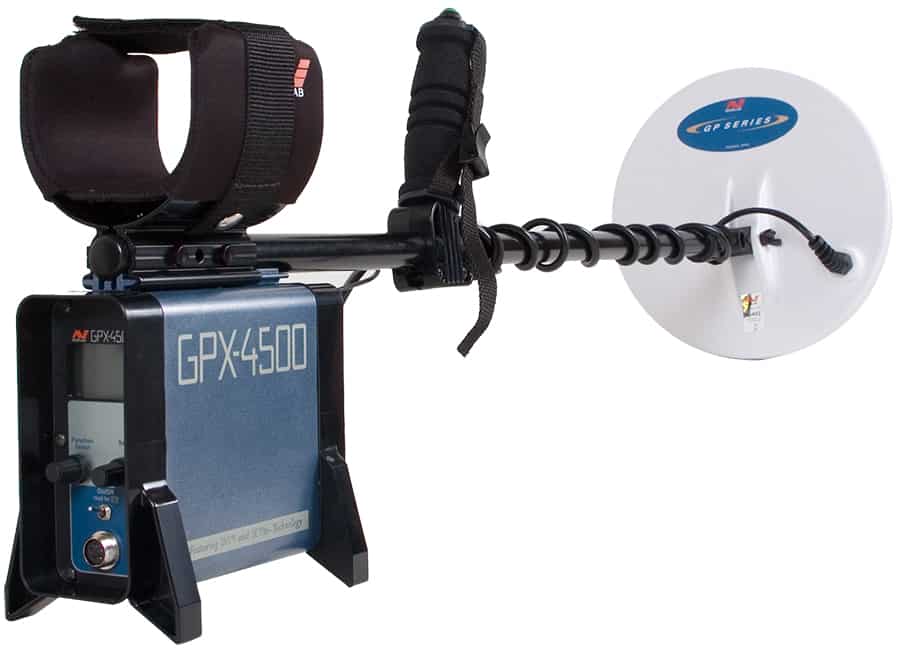
Minelab GPX 4500
This detector features SETA technology and is immune to interference. SETA stands for “Smart Electronic Timing Alignment.” Noises that are caused by magnetic interference are minimized in each of the six timing options, and each timing option can be independently adjusted and operated for greater efficiency.
This detector has many special features. It has a backlight on the screen so you can detect at night or in dark areas. The stabilizer provides you with a smoother threshold to pick up the faintest of signals, and the “iron reject” option lets you filter out junk metal.
- Weight: 5.3 pounds
- Frequency: Bi-Level, Advanced Pulse Induction
- Waterproof: No
- Warranty: Three-year limited
- Workhorse: Best general-purpose gold & relic machine
- Excels in highly mineralized ground (pulse induction)
- Full range of coils for finds buried deep
- Heavy weight
- It is not waterproof
- Battery life tends to decline over time
Best Value
Garrett AT Max
The AT Max features Z-Lynk, Garrett’s proprietary wireless technology. It can be used on land or in freshwater and is waterproof up to 10 feet. The high-resolution iron discrimination feature will help you filter out junk like bottle caps and other trash.
The AT Max also has four search modes: all metal, custom, coins, and zero discrimination. The all-metal mode provides the best depth and sensitivity. One of the great features about this detector is that it has a battery life between 15-20 hours.
- Weight: 3.4 lbs
- Frequency: 13.6 kHz
- Waterproof: Up to 10 feet
- Warranty: 2-year limited
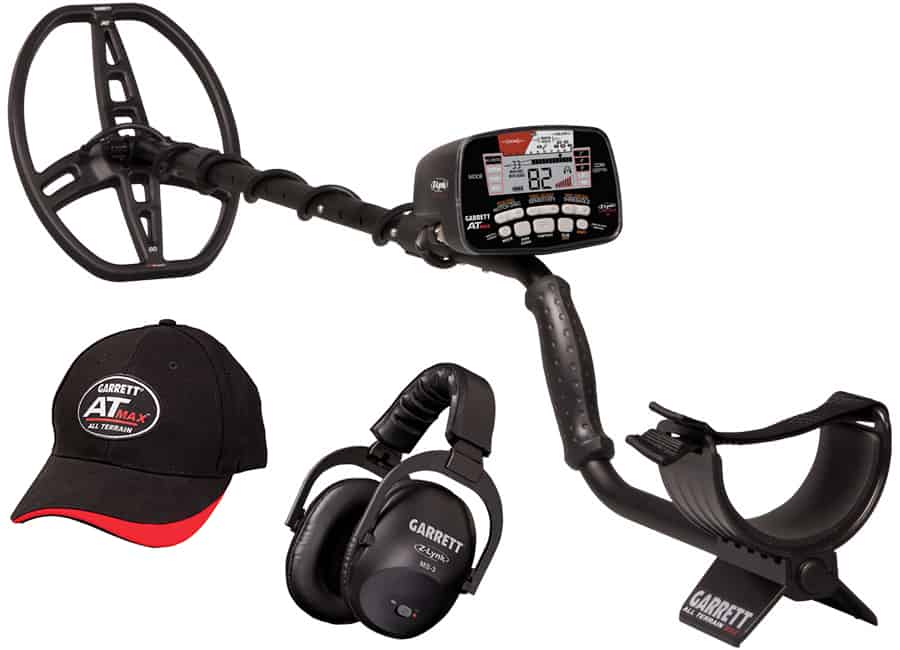
- Wireless headphones
- True all-metal mode
- You can pair your headphones to a Z-Lynk pinpointer
- It does not perform as well as other machines in saltwater
- It can be chattery and has a learning curve
- Constant ground balancing is needed
- This machine has some amazing improvements on my previous machines. I love the backlight, wireless headphones, and the grip, the rubber grip.. thank the Lord for the rubber grip. The new grip is so much easier to clean and keep clean. Plus, all the electronic upgrades make this an amazing machine. I highly recommend this machine. - SilverSearcherWV
Best for Beginners
Garrett ACE Apex Metal Detector
The Garrett ACE Apex Metal Detector is a great option for an affordable metal detector at the beach. This machine has a waterproof coil and a rainproof control box, an adjustable armrest, and a high-resolution ground balance. The new technology design of this machine will also allow you to switch back and forth between single and multifrequency.
- Weight: 2.5 lbs
- Frequency: 5, 10, 15, 20 kHz, Multifrequency, Multisalt
- Waterproof: Waterproof search coil; Rainproof control box
- Warranty: Yes
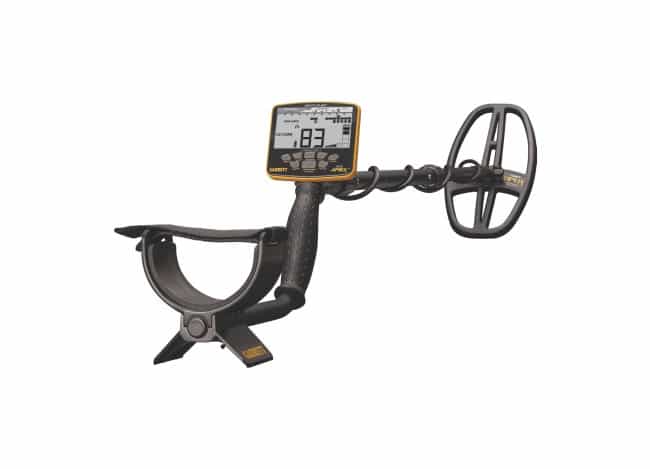
- Can be used in various mineralization conditions
- High-resolution ground balance
- Multi-Frequency Technology
- Adjustable armrest
- Control box is not waterproof
- Does not come with an armrest strap
- No adjustable shaft
What Is The Best Metal Detector for Gold?
Panning for gold or using a pickaxe for hours on end isn’t necessary anymore if you use a metal detector. Detectors made specifically for gold hunting make the hobby a whole lot easier. Visit mountains or areas like rivers, streams, and exposed rock bed to increase your chances of finding gold, especially in the western U.S.
Look for a metal detector that works well in highly mineralized soil. A frequency of 20 kHz or higher is great for gold. You’ll also want a waterproof coil, but the machine itself doesn’t need to be waterproof. As with relic hunting, a harness or guide will be helpful to distribute the weight of heavier machines, since finding gold can take a long time.
One of the most important features in a detector used for gold hunting is that it is stable (meaning less noise) in mineralized ground. Soil out west has a lot of iron ore that will interfere, so having a detector that can find a gold nugget that’s surrounded by iron ore is really important.
Best of the Best
Minelab GPZ 7000
With the Minelab GPZ 7000, you’ll find even the smallest gold nuggets you might miss with other detectors. The Super-D Smart Coil consists of a central transmit winding and two outer receive windings, which greatly decreases interference from magnetic and/or mineralized soils. This detector finds nuggets that are up to 40 percent deeper than previous Minelab GPX models.
This is the most expensive metal detector in our guide, but we think that the payoff is worth it for this Zero Voltage Transmission machine.
- Weight: 7.32 pounds
- Frequency: ZVT (Zero Voltage Transmission)
- Waterproof: Standard coil is waterproof to 1m/3ft.
- Warranty: Three-year limited
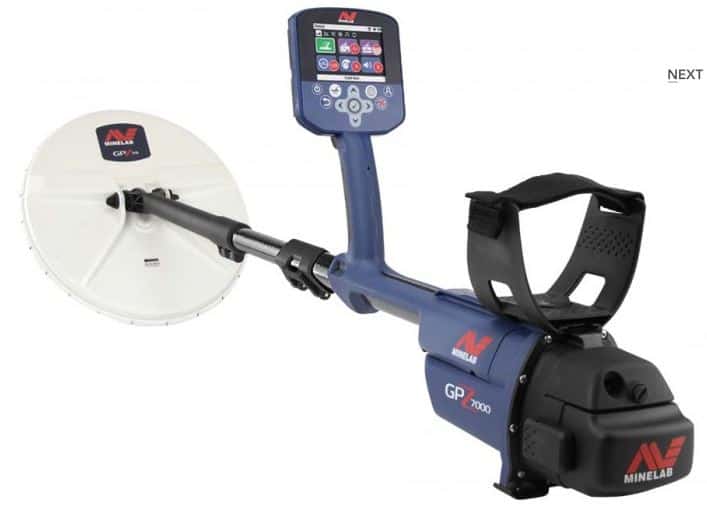
- Deepest detection depth on all types gold
- Electronically updateable via Minelab’s website
- Full range of gold timing for all situations
- Very heavy
- Not waterproof
- No arm rest strap
Best Value
Minelab Gold Monster 1000
Minelab’s Gold Monster 1000 has a gold chance indicator, so you can know the likelihood of whether there is gold before you start digging.
The controls are easy to use, the coil is waterproof up to 3-feet, and the control box is rain proof. It also comes with your choice of coils, battery options, and shaft configurations.
The intermediate 45 kHz frequency and high-speed signal processor boosts sensitivity to gold, no matter the size of the nugget.
- Weight: 2.94 pounds
- Frequency: 45 kHz
- Waterproof: No. Coils are waterproof.
- Warranty: Two years for control box and coil
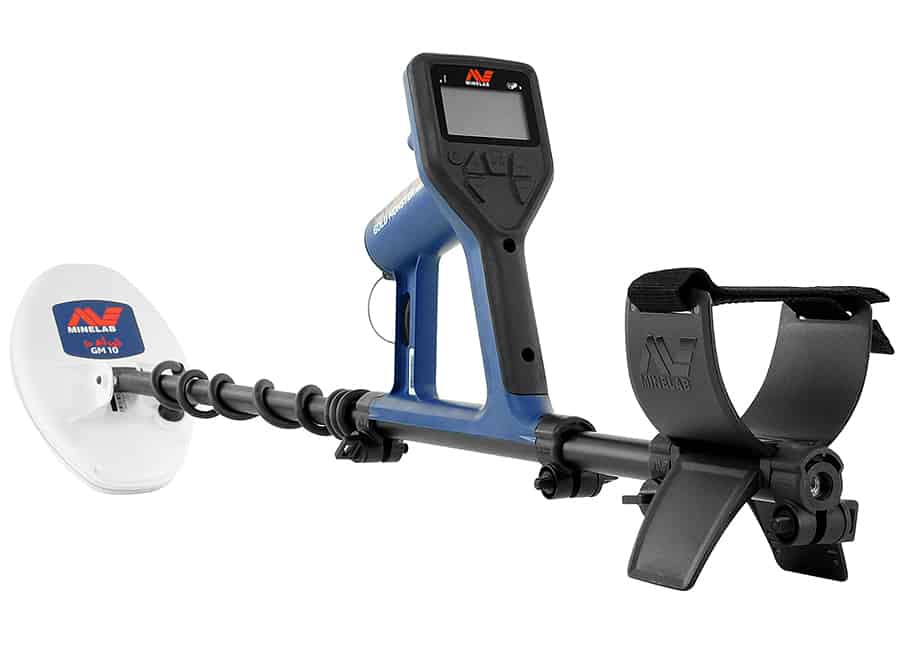
- Affordable
- Great at picking up fine gold
- Light weight
- Not waterproof
- Does not handle mineralization well
- Not as deep as pulse induction machines
Best for Beginners
XP ORX Metal Detector
Although the XP ORX Metal Detector is one of the machines for finding gold and coins, and if you are just starting out we highly recommend this detector. The XP ORX Metal Detector comes with 99 levels of sensitivity, 20 levels of threshold, and a pinpoint function with target zoom.
- Weight: The lightest machine on the market at only 770grs (remote hip mounted)
- Frequencies: 13 Khz – 81 Khz
- Waterproof: Non-waterproof
- Warranty: 5-year warranty
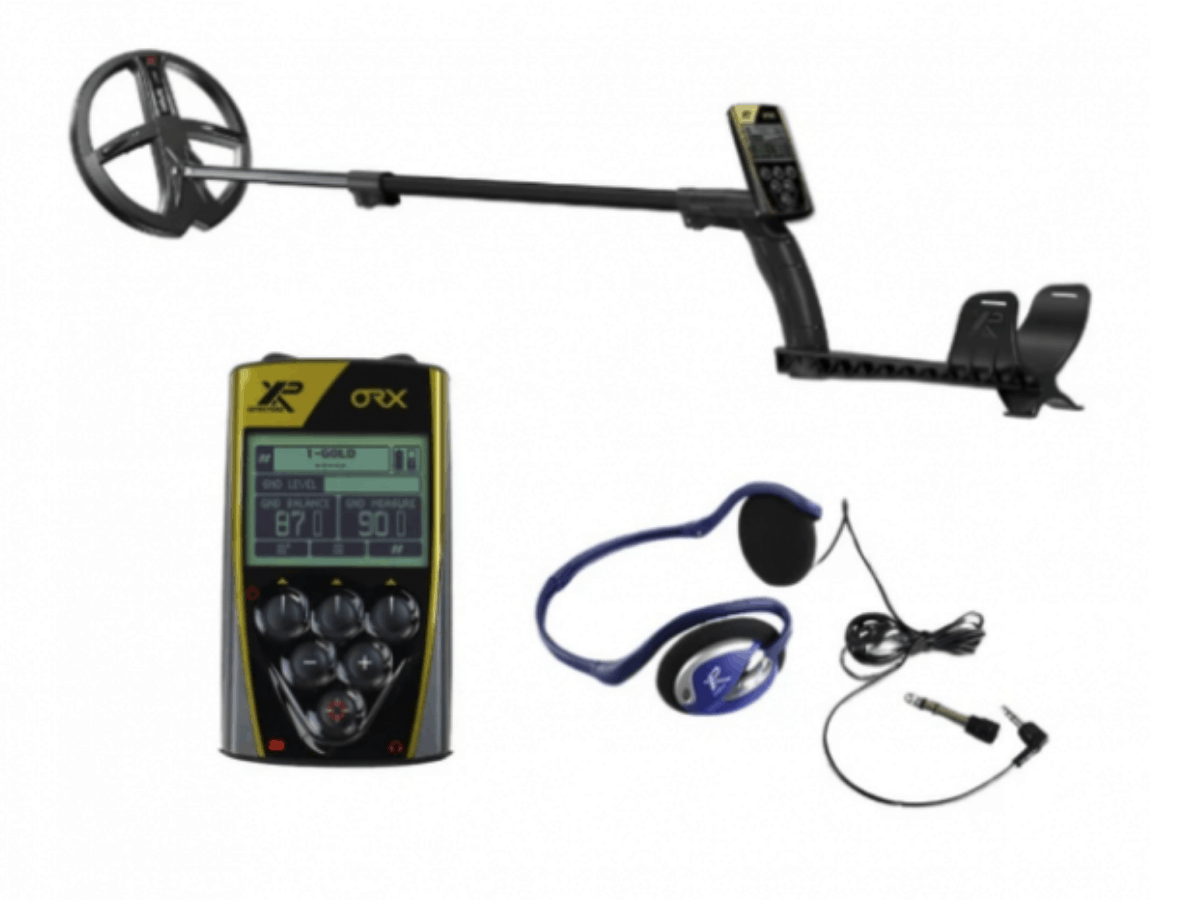
- HF coil technology (21 Frequencies ranging from 13 to 81kHz)
- X35 coil technology (35 Frequencies ranging from 3.7 to 27.7kHz)
- Extreme sensitivity to small targets with high-frequency 50kHz and 81 kHz
- 4 factory programs: Gold Prospecting (x2) – Coins and Relic (x2), + 2 user
- Does not come with a GPS
- No Target ID
- Does not come with Bluetooth headphones
- Non-waterproof
For a more in-depth guide on the best metal detector for gold, read our complete buyer’s guide!
What Is The Best Metal Detector for Saltwater and Beaches?
Beaches are one of the best places to metal detect because of their popularity over the years. People lose all kinds of things at the beach, and, of course, things wash up on the shore, too. Beaches are especially known for “fresh drops.” Imagine a beach filled with hundreds of people each day being tossed around by waves and slathering their bodies in sunscreen. It’s a perfect storm for finding gold rings and chains.
Being able to manually adjust ground balance is important when you’re detecting at the beach. Saltwater affects metal detectors in the same way highly mineralized soil does. It becomes difficult to focus on valuable items when those items are surrounded by so much potential noise. A multi-frequency detector will be very useful because the ground is continuously changing at the beach, from dry sand to wet sand to surf. Ground tracking is another important feature so that the machine itself can detect what kind of soil or sand conditions you’re on as you hunt.
Beach detectors need to be waterproof. A wave could knock you down while detecting and ruin any machine that is not waterproof.
Best of the Best
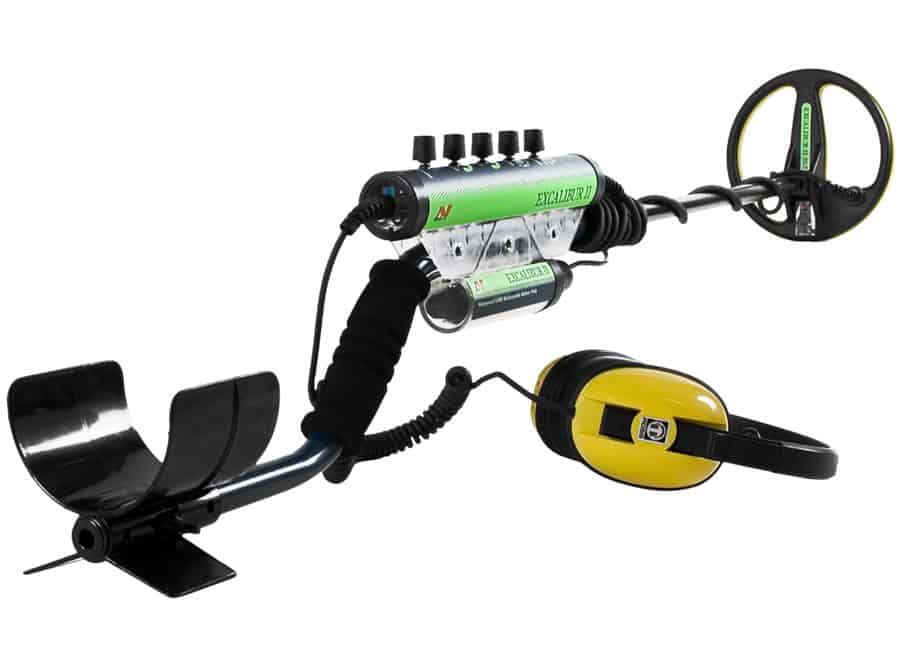
Minelab Excalibur II
Do you want to go metal detecting and scuba diving? The Minelab Excalibur II is for you. This detector is waterproof up to 200 feet, but it’s also effective on land. It features 17 different frequencies to help you find more coins, rings and relics buried deep down.
One of the nifty features is that this detector emits a different tone for every frequency. The tone for gold, for example, will sound different than the tone for silver.
- Weight: 5.1 pounds
- Frequency: 17 frequencies from 1.5 kHz – 25.5 kHz
- Waterproof: Up to 200 feet
- Warranty: One year limited
- Waterproof to 200 feet
- Uses Broad Band Spectrum (BBS) multi-frequency technology
- Different tone for each frequency
- Headphones are hardwired to the machine
- Without proper care, the seals can wear down
- A little heavy at over 5 pounds (but not too bad if used underwater)
- I have to say that it is truly a perfect machine for the beach and water hunting that I do. It took me about a week to begin to distinguish the different signature tones for the Excalibur, but in about two and a half weeks I have already found a nice gold ring and an assortment of .925% silver jewelry. I really like the ease of the turn on and go nature of the Excalibur. I simply tune the threshold and leave my other dials set from my last successful hunt and I'm off. - Robert
Best Value
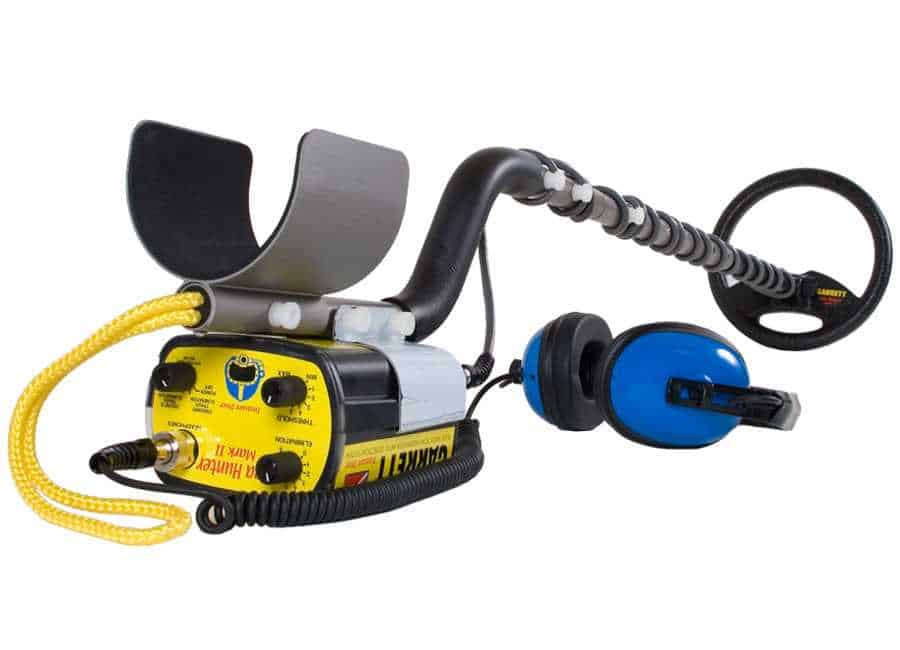
Garrett Sea Hunter Mark II
Garrett’s Sea Hunter Mark II has been one of the best underwater detectors for over 25 years. It can ignore most trash, including pull tabs and foil, without degrading the sensitivity of rings and coins in Discrete Elimination mode. It includes underwater headphones and an electronic housing that can be mounted at different locations (including on your hip). This detector cancels salt and ground mineralization with pulse induction circuitry.
- Weight: 5.1 pounds
- Frequency: PI — 750 pulses per second
- Waterproof: Submersible up to 200 feet
- Warranty: 1-year limited
- Affordable pulse induction machine (one of the least expensive PI machines on the market)
- Waterproof to 200 feet
- Non-motion deep-seeking mode for diving
- The discrete Elimination mode is not as advanced as some other machines
- A little heavy at over 5 pounds (but not too bad if used underwater)
- There is no coil cover for the 8” coil
- Waterproof. Easy to use? Gold and silver rings jump out at you. Dry sand. Or chest deep water. Great machine. Oh by the way. Coin shooters and relic hunters if you are a beep and dig guy as I am. This is your machine as well. Gold prospector? This is it. I've found pickers with this on my land in the north Georgia mountains. I live a block from the beach in Panama City Beach Florida. I have land in the mountains. This is a go anywhere, do anything machine. - James Z.
Best for Beginners
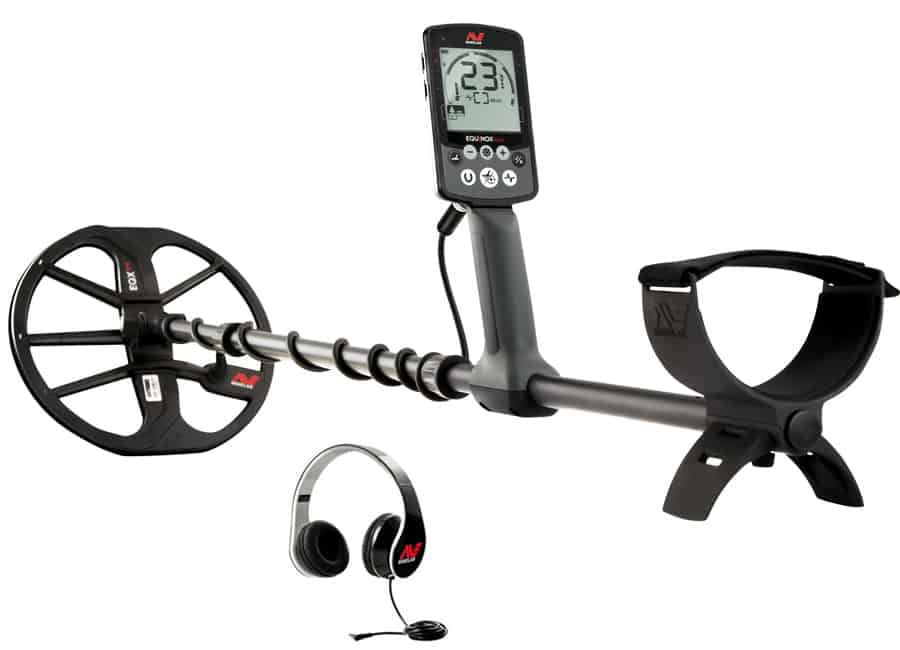
Minelab Equinox 600
This detector is multi-frequency, and also has a wide range of single frequencies. These frequencies have a high level of accuracy. One customer reported that he was detecting at the beach and fine-tuned his frequency settings. It beeped in the dime range, and sure enough, he found a dime. It’s good at filtering out the junk and does well in freshwater or saltwater.
- Weight: 2.96 pounds
- Frequency: 5, 10 and 15 kHz; multi
- Waterproof: Up to 10 feet
- Warranty: Three-year limited detector; one-year battery
- Lightweight
- Easy to use
- Waterproof up to 10 feet
- Does not come with wireless headphones, but you can use bluetooth
- It does not have the ability to switch to single frequency for gold modes
- It does not have a backlight
- I am a newbie to metal detecting and bought this detector. Out of the box, it was super simple to use since it has presets of beach, beach water, park and field. I have used it about seven times on the beach and have found two necklace pendants and lots of quarters and dimes. I have nothing to compare it with, but feel it is very good and solid as I rarely get alerted to junk metal and it gives you a minus number when it is garbage. The coil is large, perfect for trying to detect in large areas like a beach. I am hooked and my young adult daughter and I have had a blast. I can totally recommend the Equinox 600. - Avana
What Is The Best Metal Detector for Freshwater?
Many beaches are hunted with metal detectors every day, but the shoreline of freshwater areas is not. Because of that, you may have more luck at a lake, creek, stream or river than you would at a beach. You can find a lot of jewelry and coins in freshwater areas.
Since freshwater won’t have the interference from the salt that beaches do, you have greater flexibility in picking a freshwater machine. You do, however, want to make sure it’s waterproof and sturdy. If you only plan to go ankle deep in water, a waterproof coil may be enough, but going this route always comes with risks. A dropped machine that is not waterproof can result in a dead machine and lost investment. Because of this risk, we never recommend using a machine that is not waterproof anywhere near water.
You may also want to consider a coil cover, since you may be scraping your detector along rocks and more rugged terrain.
Best of the Best
Minelab Excalibur II
Do you want to go metal detecting and scuba diving? The Minelab Excalibur II is for you. This detector is waterproof up to 200 feet, but it’s also effective on land. It features 17 different frequencies to help you find more coins, rings and relics buried deep down.
One of the nifty features is that this detector emits a different tone for every frequency. The tone for gold, for example, will sound different than the tone for silver.
- Weight: 5.1 pounds
- Frequency: 17 frequencies from 1.5 kHz – 25.5 kHz
- Waterproof: Up to 200 feet
- Warranty: One year limited

- Waterproof to 200 feet
- Uses Broad Band Spectrum (BBS) multi-frequency technology
- Different tone for each frequency
- Headphones are hardwired to the machine
- Without proper care, the seals can wear down
- A little heavy at over 5 pounds (but not too bad if used underwater)
- I have to say that it is truly a perfect machine for the beach and water hunting that I do. It took me about a week to begin to distinguish the different signature tones for the Excalibur, but in about two and a half weeks I have already found a nice gold ring and an assortment of .925% silver jewelry. I really like the ease of the turn on and go nature of the Excalibur. I simply tune the threshold and leave my other dials set from my last successful hunt and I'm off. - Robert
Best Value
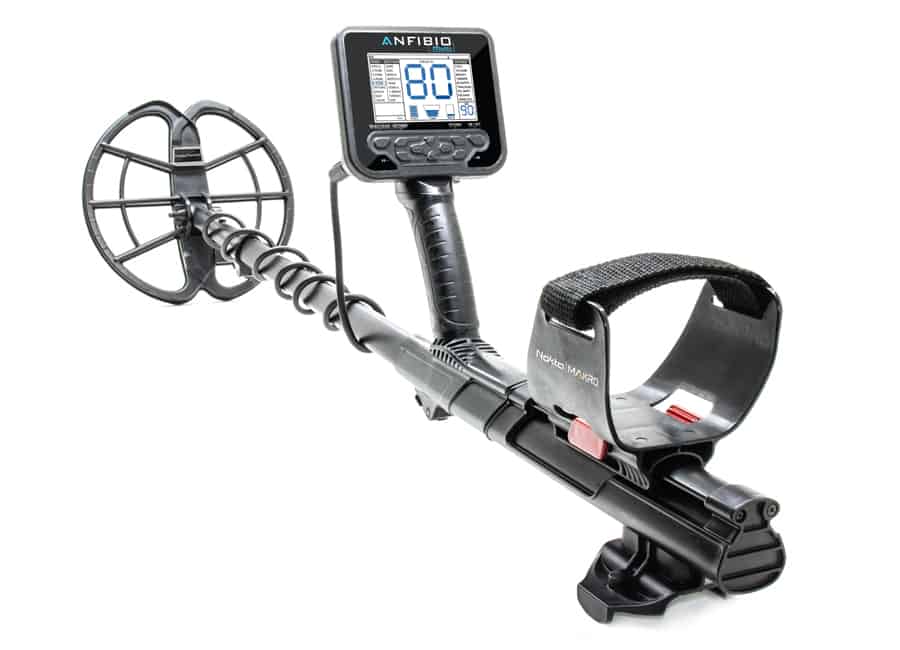
Nokta Makro Anfibio Multi
The Nokta Makro Anfibio Multi is waterproof up to 16 feet. It’s rugged, durable and reliable and the menu features a simple design that is very easy to use. Multiple search tones make this great for finding a wide variety of objects. It’s very stable on dry or wet sand, meaning it isn’t picking up signals for “junk.”
The Anfibio includes a vibration mode, which is specific to this manufacturer for the hearing impaired. This machine offers nine search modes, including a deep mode and a cache mode. It also features an adjustable armrest, which most other machines don’t have.
- Weight: 3.7 pounds
- Frequency: Three Frequencies: 5kHz / 14kHz / 20kHz
- Waterproof: Up to 16.4 feet
- Warranty: 2-year limited
- Vibration mode for hearing impaired
- Waterproof up to 16 feet
- Deep mode provides ultimate depth
- Depth meter is not always accurate
- Not true multi frequency machine — frequencies have to be adjusted
- Does not include a USB charging block
- This is the first multi frequency machine I have owned. I went back to multiple sites I had hunted with a single frequency machine and found double the relics with the Anfibio. What's really cool about this machine is the ability to control the volume of your iron signals, This is really a bonus when hunting old homestead and iron-infested ground. The unit has an internal battery in the rear of the handle, that balances the machine nicely. I would definitely recommend this unit if your thinking about upgrading your single frequency detector. - Mark
Best for Beginners
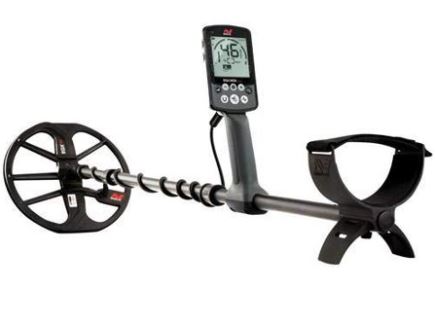
Minelab Equinox 800
The Minelab Equinox 800 can be used on every type of ground and is great for coins, relics, and gold. The gold mode is great for gold nuggets. This detector has eight custom search profiles and is fully submersible up to 10-feet. It’s lightweight, and holds up well in any environment, including around saltwater. The LCD screen features target numbers that allow you to know your target ID at a glance.
This machine set the metal detecting world on its ear when it was introduced to the public. The only machine with true simultaneous frequency technology that Minelab refers to as Multi IQ, this machine is revolutionary and is changing the game in metal detecting. It has the fastest recovery speed and target separation of any machine on the market today. It has been a perennial bestseller since its introduction and created massive waiting lists and production backlogs when initially introduced.
- Weight: 2.96 lbs
- Frequency: Multi, 5kHz, 10kHz, 15kHz, 20kHz, 40kHz
- Waterproof: EQUINOX is Fully Submersible, Ideal for Detecting at the Beach and in Rivers, Streams and Lakes (3m / 10-feet)
- Warranty: 3-Year Limited Detector, 1-Year Battery
- Fast recovery speed and target separation for trashy areas
- Multi IQ technology (the newest technology on the market)
- Lightweight
- Does not come with a manual
- The charging block is sold separately
- It has a learning curve if you’re not familiar with Minelab detectors
- I am new to detecting but have been amazed with the Equinox 800. It is easy to use right out of the box, but also has a lot of functionality and adjustments that you can make once you get used to the detector. It is amazing just how small of an object it will detect at a fairly deep depth. I recommend downloading the manual and reading through it. Very extensive. Easy to see why Minelab is on top of their game with this machine! I know that there has been bad press regarding the detector's shaft being too flexible but mine is pretty solid once tightened down. - Joe D.
What Is The Best All-Purpose Metal Detector?
All-purpose metal detectors can be used pretty much anywhere and in most conditions. These machines are often the choice made by detectorists who are looking for a workhorse to do more than one job.
These machines can be outperformed by the best-in-class machines described in the various categories above. However, because they are highly capable machines that have a “do-anything” attitude, they are often the first purchase (and sometimes only purchase) by thousands and thousands of metal detectorists across the country.
This category of metal detector represents many of our best sellers. Think of these as go anywhere, do anything machines. They are the utility infielder of the metal detecting world. They are the Magic Johnsons of the metal detecting world. If Chevrolet made a Corvette SUV it would fall into this category.
Best of the Best
Minelab Equinox 800
The Minelab Equinox 800 can be used on every type of ground and is great for coins, relics, and gold. The gold mode is great for gold nuggets. This detector has eight custom search profiles and is fully submersible up to 10-feet. It’s lightweight, and holds up well in any environment, including around saltwater. The LCD screen features target numbers that allow you to know your target ID at a glance.
This machine set the metal detecting world on its ear when it was introduced to the public. The only machine with true simultaneous frequency technology that Minelab refers to as Multi IQ, this machine is revolutionary and is changing the game in metal detecting. It has the fastest recovery speed and target separation of any machine on the market today. It has been a perennial bestseller since its introduction and created massive waiting lists and production backlogs when initially introduced.
- Weight: 2.96 lbs
- Frequency: Multi, 5kHz, 10kHz, 15kHz, 20kHz, 40kHz
- Waterproof: EQUINOX is Fully Submersible, Ideal for Detecting at the Beach and in Rivers, Streams and Lakes (3m / 10-feet)
- Warranty: 3-Year Limited Detector, 1-Year Battery

- Fast recovery speed and target separation for trashy areas
- Multi IQ technology (the newest technology on the market)
- Lightweight
- Does not come with a manual
- The charging block is sold separately
- It has a learning curve if you’re not familiar with Minelab detectors
- I am new to detecting but have been amazed with the Equinox 800. It is easy to use right out of the box, but also has a lot of functionality and adjustments that you can make once you get used to the detector. It is amazing just how small of an object it will detect at a fairly deep depth. I recommend downloading the manual and reading through it. Very extensive. Easy to see why Minelab is on top of their game with this machine! I know that there has been bad press regarding the detector's shaft being too flexible but mine is pretty solid once tightened down. - Joe D.
Best Value
Garrett AT Pro
Like the more expensive CTX 3030, the Garrett AT Pro is fully submersible up to 10 feet. It’s an all-terrain detector that has 40 different discrimination settings to notch out various types of ferrous metals, including iron. Customers say this is one of the most versatile metal detectors out there. In the past, separate headphones were recommended, but with the upgraded MS-2 headphones you have all you need to get out detecting!
The Pro audio mode setting allows users to “hear” the properties of the target they have detected. It will emit a different tone depending on how deep an object is buried.
A digital target ID on the screen also allows users to quickly identify what the machine is detecting. The most ferrous targets are labeled between 1 and 40, with the most conductive targets — like thick silver — registering closer to 99.
Sometimes, when detecting, a larger ferrous target can be interpreted as non-ferrous (and therefore valuable). The AT Pro contains a feature called Iron Audio which, with the press of a button, can correctly identify the target.
- Weight: 3.03 pounds
- Frequency: 15 kHz
- Waterproof: Up to 10 feet
- Warranty: 2-year limited

- Waterproof up to 10 feet
- Easy to use
- Can be upgraded via Z-Lynk (Garrett’s proprietary wireless technology) for use with wireless headphones
- Limited depth and less than accurate reading in saltwater
- The Zero mode is not a true all-metal mode
- No backlight
- “I am a new first time user of a metal detector and after shopping around I decided on buying a Garrett AT Pro because of its versatility and easy to understand display. I like that it can be used in the water and is light enough to be used for hours at a time. After opening the box and getting right to detecting, I haven't been disappointed. The accessories that came with the AT Pro helped me in the field and the Relic Quest book was a very nice read. Thanks to Garrett for making such a quality machine.” - Christopher C.
Best for Beginners
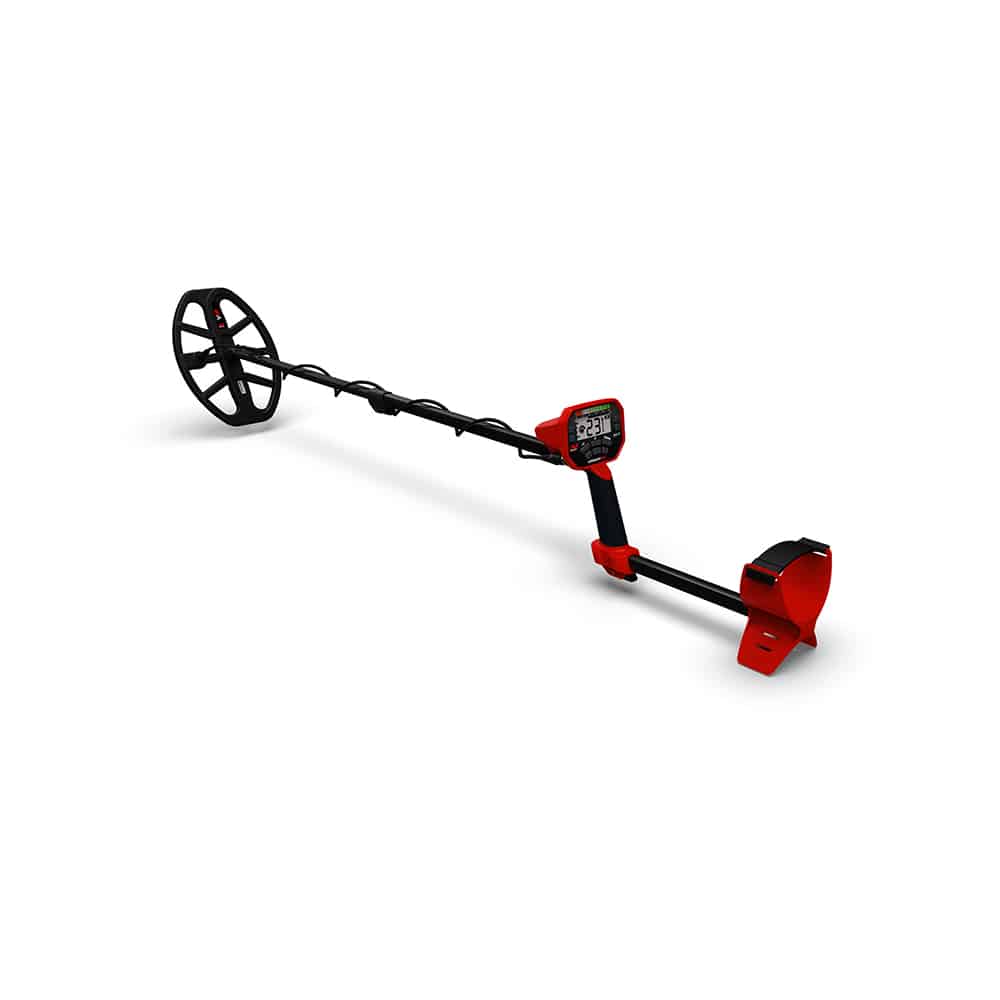
Minelab Vanquish 540 Pro-Pack
Our team also recommends the Minelab Vanquish 540 ProPack metal detector for beaches. The ProPack has two coils — an 8” and 12” for greater depth and precision. The coils are waterproof up to 3.3 feet, and the control pod is water-resistant with an included rain cover.
- Weight: 2.8 lbs.
- Frequency: Multi-frequency
- Waterproof: Coils are waterproof up to 3.3 feet
- Warranty: Two-year limited
- Comes with two search coils
- Multi-IQ tech
- Great for every type of soil
- More expensive than the basic model
- Will update as more reviews come in!
- No reviews yet! Taking preorders only. -
Customer Favorite
Final Word on The Best Metal Detector of 2021
We hope this guide helps you decide which metal detector is best for you. There are many things to take into consideration, including where you will use your metal detector and what all you’re looking for.
In our experience, once you start metal detecting, you never want to stop. There are so many different adventures you can experience with a metal detector. Visit our Treasure Finds page to read about all the different items our customers have found over the years.
If you have more questions after reading this guide, please feel free to give us a call or pop open the chat window on our website.
Which is the Best Metal Detector for Me?
The number one thing people want to know is, what are the best metal detectors on the market? Although this is a good question, the experts will always modify it to an even better question: what are the best metal detectors on the market for you. Think of it like a good, old-fashioned detective novel and consider the following questions: Who. What. Where. And how much.
Who is the metal detector for?
Identify your preferences. Are you someone who will use a metal detector occasionally in the local park, or are you more likely to take a trip to a prime location and hunt for hours upon hours? Are you physically fit and ready to carry a heavy-duty metal detector, or would you rather a lightweight more simple model. Do you want the top of the line or basic beginner? Before you invest in a good metal detector, know your tendencies and that will help you select what is the best metal detector.
What is the metal detector for?
This line of thinking will help you establish what exactly you are hoping to find. Everyone defines treasure a little differently. Try to narrow down your field of focus and prioritize what features you will need your metal detector to have. Will your treasure be glass bottles, coins, and historical relics? Or do you want to hunt for fine gold and silver? Keep in mind, that metal detectors used for prospecting precious metals generally do not have discrimination and will require lots of manual ground balancing, like manual focus on a camera versus autofocus. If you want more of an autofocus approach, look for prospecting metal detectors with discrimination.
Where will you metal detect?
A big part of the where will be determining if you are going to be predominately on land or in water. All metal detectors have waterproof coils, but this does not make them underwater metal detectors. Completely waterproof models will work through audio signal, will not have meter display, and will have fewer openings in the control box. But don’t feel too much pressure in deciding where you will always be using your metal detector. If this turns out to be a favorite hobby, there is always room for an upgrade.
What is your budget?
When you first start your search do not make the mistake of assuming used metal detectors will be cheaper. That is not always the case. The cost of a metal detector will be directly influenced by how many features you will be requiring. The more features your detector has, the higher the cost. Metal detecting can be an expensive sport, but it is a rewarding one. In many ways, a good metal detector is a good investment. When you are budgeting for your metal detector, consider what you want to spend on the metal detector itself plus the accessories that will enhance your experiences. Accessories are vital to truly experiencing the best metal detectors. You will need:
- Headphones (with volume control)
- Pinpointers
- Trowels
- Sand Scoops
- Coil Cover
- A Metal Detector Bag
After evaluating these questions, you should have a better idea of how to narrow down the vast array of metal detectors and estimate your start-up costs. Do a little research and meet us back here to launch into one of the most exciting sports! Happy treasure hunting!
Best Metal Detectors For Coin Hunting
Why do people go coin hunting?
People of any age or physical ability can get in on the action with just a simple coin detector. The best part of coin hunting is that they can be found anywhere people have been and it is a great way to enjoy history on a personal level. All good coin hunting excursions begin in the local library for research on local gathering places. From there, a coin hunting adventure can go anywhere but most people tend to find their coins in grassy fields, sandy beaches, or areas that were once inhabited but have since been abandoned.
Where do people go coin hunting?
In fact, one of the most valuable coins found through metal detecting in the United States was dug up in a Long Island field. Dating back to 1652, this rare New England sixpence was estimated to be worth at least $100,000.00! It is even possible to find coins dating back to the Medieval or Roman era in areas where human habitation predates the new world.
A “Treasure Cache”
This is what is normally referred to as a “Treasure Cache”. Individuals will choose to store their coins in a container commonly near walls, walkways, trees, or stone walls instead of taking them straight to the bank. These caches can make coin hunting a lot more lucrative than just looking for one coin.
How do you choose the perfect coin metal detector?
When selecting a device, it is important to look at how the coin detector is configured and its overall weight. There are two different varieties of coin detectors to choose from: pole mounted or hip mounted. Which coin detector is chosen will determine where the weight of the device is going to rest. Newer coin detectors are made with lighter electronics than older models so purchasing a newer device will help to alleviate strain on the body.
Target Identification Meters
These meters range from the very basic readout to the most elaborate visual picture of what is in the ground. Other coin detectors use audio tones to identify unearthed targets. The use of audio or visual target identification meter will largely depend on the user and whether or not they are more of a visual person or someone with finely tuned hearing.
Coin Metal Detector Coils
The majority of coin metal detector coils have medium-sized coils that are very sensitive to coins in particular so they are a good match for just about every budget. Larger coils are typically used for finding deeper targets such as Treasure Caches and smaller coils excel in locating coins that are closer together. The ideal search coil for a coin detector though is one with built-in pinpoint control. The pinpoint control can accurately identify where the item is so that digging it up is a breeze! After all, money doesn’t grow on trees!
Recommended Coin-Hunting Detectors
How To Select A Metal Detector
Seek advice from a metal detecting expert
Selecting a new metal detector for the beginning treasure hunter can be daunting. There are a lot of different makes and models out there which can make finding a device pretty difficult. There is always the advice of more seasoned hunters out there to guide the beginner to find the perfect metal detector. While it is true they can provide you with good guidance, it always a good idea to talk to more than one person as hobbyists and professionals are typically committed to a particular brand or model. Sometimes, they can be unfamiliar with a newer or different brand or model of the metal detector as new features and equipment are introduced quite frequently.
Where will you be metal detecting?
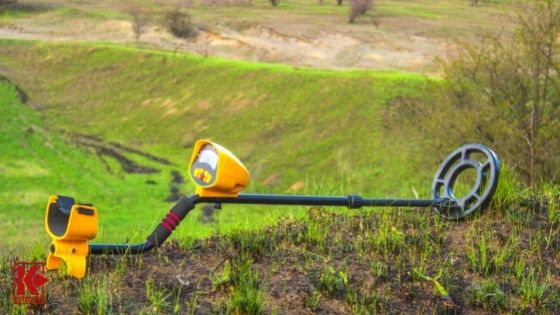 Metal Detector On Field
Getting advice from someone else is great but anyone looking for a new metal detector needs to figure out where and how frequently they are going to be using the device. Paying special attention to where a metal detectorist is hunting is crucial because it also typically means what they will find. A person metal detecting on the coast will be looking for coins or jewelry while someone hunting in rugged gold country is typically looking for nuggets. If they are metal detecting at a historic site they will be looking for relics.
Specialty metal detectors
This is where it is important to pay attention to the choice of the metal detector because having a specialty device can make or break a treasure hunting experience . Specialty metal detectors have multiple operation modes for detecting different types of metals and will typically perform as promised by the manufacturers. Depending upon the brand of metal detector, the device can vary on the amount and kinds of settings and features. Some metal detectors may require different swing speeds, some may weigh more and some may vary in the number of pieces they come apart in.
Who will be using the metal detector?
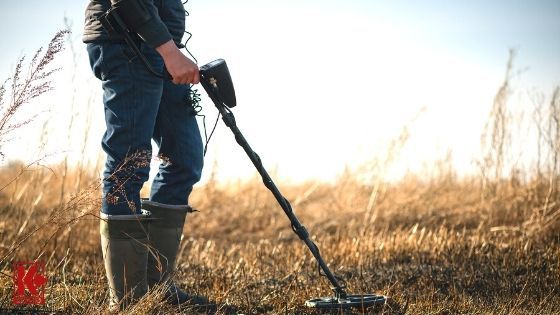
Consider The Size Of The Metal Detector
Another thing to consider is who will be using the metal detector. This can impact decision making especially if there is a small child involved. It is crucial to consider the size of the metal detector and how long or short the pole can be. Some metal detectors can be adjusted to fit the person’s height and arm length. Others can be adjusted at the arm cup and some can even remove the controls so that they can be mounted in a small pouch.
Decide on your budget
The best way to do this is to look at other big purchases made to determine how much to spend. If the person looking for the metal detector likes to buy a top-of-the-line, full-featured product then there is an option for that. If they just want to dip their toe in the water to try out the hobby, there is a metal detector for them as well. If someone was looking for a top-quality metal detector without paying top quality prices then it’s recommended to purchase at least the second model up in the brand. These devices usually include a lot more features than the basic models and provide more overall control without breaking the bank. It is important to be flexible and to think about a dollar range before purchasing. Sinking money into a hobby or profession without considering the cost of doing so would do more harm than good. Besides, if someone saves enough money on the purchase of a metal detector, there will be more money in the budget for coil covers, scoops, headphones, and trowels!
Other Types of Metal Detectors
Best Metal Detectors for Beginners
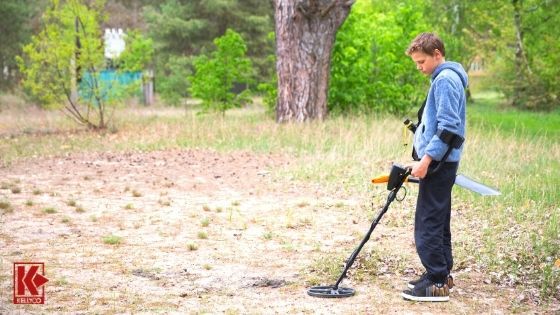
Metal Detectors For Beginners
For a complete guide on this, read our buyer’s guide for the best metal detector for beginners.
In a day and age when even technology is trying to promote games that get kids moving and out of the house, why not introduce the kids in your family to the thrill of hunting for real treasure? This is better than Pokemon GO. Metal detecting for beginners is an exciting new world of discovery that also teaches valuable lessons in endurance. Your kids will be exercising both their minds and their bodies; and at the end of the day, have something to show for it.
What is the best metal detector for a beginner?
You do not have to spend large amounts of money to begin your metal detecting journey. There are inexpensive metal detectors that are perfect for the new enthusiast in your life. However, it is important to know that just because toy departments and toy sites advertise metal detectors, it does not mean that they are anything more than a toy. Many times, this kind of beginner metal detector will only detect junk and does not have a strong enough signal to actually detect valuables. What you really want is the best metal detector for the money–easy to use, but with all the technology that makes it the real thing. Below are some ideal metal detectors for beginners.
Entry-Level Metal Detectors:
- Nokta Makro Simplex+ Metal Detector
- Fisher F22 Weatherproof Metal Detector
- Garrett ACE 400 Metal Detector
- Minelab GO-FIND 66 Metal Detector
- White’s TREASUREmaster Metal Detector
Mid Level Metal Detectors:

Treasure Awaits
- Fisher F75 Metal Detector
- Nokta Makro Racer Standard Package Metal Detector
- Garrett AT Pro Metal Detector
High-End Metal Detectors:
- Garrett ATX Extreme PI Metal Detector
- Minelab CTX 3030 Standard Metal Detector with Wireless Headphones
- White’s Spectra V3i Metal Detector
Where’s the Treasure?
Metal detecting is a great way to encourage family trips to locations known for the valuables you can find there. From metal scraps, lost coins, and jewelry to Civil War and Indian artifacts, the possibilities are endless! Get the kids in on the planning by taking a trip to the library. The whole family can participate in a hobby that inspires imagination, research, and geography.
Best Metal Detectors For Finding Coins
(How To Be A Successful Coin Hunter)
The year was 1972. Summertime had arrived… and a coin hunter was about to be born.

Coin Hunter
I was 15 years old and with a combination of money saved from my newspaper route and a $50.00 contribution from my mother I had just purchased my first metal detector, a White’s Coinmaster 3 TR. My owner’s manual was devoured, I had fresh batteries in my detector and, after “extensive” research I had selected my first virgin site to hunt: my grandparents’ house in Mt. Lebanon, PA.
My grandfather had built the house in 1935 for my grandmother and it was surrounded by plenty of fresh green grass that I just knew was holding treasures waiting for me to recover them.
My mother loaded me, my two sisters, and our dachshund, Fritz, into our car and we left Cleveland for the several hour drives to Mount Lebanon. After arriving, unpacking, greeting my grandparents and being forced by my mother to keep my new metal detector in the car until after dinner, I was finally allowed to show my new treasure finder to my grandparents. My grandfather, an engineer by trade, seemed amused by the device and wished me luck in finding any treasure in the yard. My grandmother, on the other hand, seemed very curious and suggested that she, my mother, and I take a walk along with their tree lawn (some call them parkways), that small strip of grass between the sidewalk and the street. She even wanted to join us, which I thought was the coolest thing—now my grandma could see me in action with my new metal detector!
So off I went to the tree lawn. I turned on my detector, set the threshold tone, and started swinging. My mother and grandmother were walking just ahead of me, chatting a bit while at the same time watching me detect. Within only a few seconds I got my first hit. Looking down in the grass I saw a shiny quarter just laying there! I didn’t even need to use my little garden trowel to dig it! I yelled out to my mother and grandmother that I had just found my first coin and showed them the quarter. All I can remember about their reaction was that they were very happy for me.
I put the coin in my pocket, swung the detector again, and got another signal. Another coin!
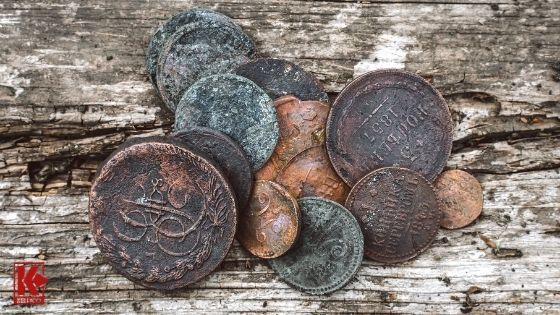
Rusty Coins
A couple of more swings and another! I couldn’t believe it, there were so many coins in the grass that I couldn’t find them fast enough with my metal detector. While my mother and grandmother looked on, I spent the remainder of the evening pulling several dollars worth of change from that one small strip of grass. What an introduction to metal detecting, and specifically coin hunting! I went to sleep that night dreaming of the riches that were just waiting for me and my new metal detector.
Well, that was quite a few years ago and there is a bit of a back story to my amazing day of coin hunting at my grandparents’ house. My mother revealed to me recently that my grandmother was more than a little skeptical about the treasure finding “gadget” that I had brought to their home. Not wanting me to be disappointed, she decided to make sure that I was successful in my treasure hunting excursion. Remember when I mentioned earlier that she and my mother were walking slightly ahead of me while I was detecting? Well, it turns out that my grandma had a few dollars in coins hidden in her apron (she always wore an apron around dinner time) and was seeding the lawn ahead of me.
I hope a smile just crossed your face. One crosses mine every time I think of that day. I think of the joy my grandmother and mother must have experienced, seeing me “find” all of those coins with my brand new metal detector. And I will always remember that first thrill of finding a lost coin. A thrill which, although I am a few years older, still is with me every time I remove a coin from the ground.
Nice story, but how does that relate to being a successful coin hunter?
The operative word here is “successful.” It’s really in how you define this one single world. For me, at the age of 15 in 1972, on that one day at my grandparents’ house, I was the most successful coin hunter in the world simply because I had found coins. And now, many years later, if I have a similar day out in the field, maybe just finding a few bucks worth of clad (everyday change), I still consider my day of hunting coins a success. Perhaps the easiest way to look at this in detail is by examining the goal of being a successful coin hunter and what exactly that means. From there we can address how to succeed in attaining that goal.
Goals
So how does one define success in terms of coin hunting? Is it finding an older coin, maybe a rare and valuable coin? Or is it finding a lot of coins? For some hunters, it is an either/or situation. I know hunters who are only satisfied if they find old coins. Clad, or everyday change, doesn’t interest them. Then I know other hunters who are perfectly content to be digging coins regardless of their age. Maybe an old coin crops up amidst their pile of change, maybe not; it really doesn’t matter to them. The digging and recovery of a coin, any coin (well, except maybe zinc pennies!) is the fun of it.
For me personally, my goals are somewhat fluid. On some days my goal is to find some old coins, or at least just one old coin. On other days I just want to detect and dig coins no matter what year they were minted. It all depends on what pops into my head before I head out. However, let’s be clear here: the goal you select for your day of coin hunting will be directly impacted by one factor more than any other. This factor will determine how successful, or unsuccessful, you are in attaining that goal. The factor in question? Location.
Location
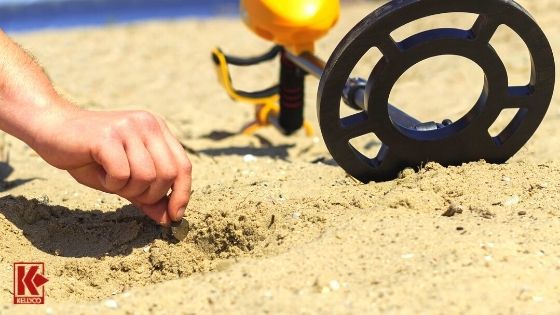
Pick The Right Location
As they say in the real estate business, it’s all about “location, location, location.”
Coin hunting is no different. Pick the right location and your chances of success are excellent. Pick the wrong location and you better have packed a whole lot of aspirin.
Take a hunter named Gary for example. Gary wakes up one sunny morning, grabs his detector, and heads out in his car, driving around, looking for a good spot to hunt. His goal: he wants to dig some old coins. So he drives around until he spots a park that sure looks old to him. He surveys the area. Some big older trees, worn wooden picnic tables, a stone restroom facility. A perfect spot he thinks. Got to be old coins here. Just got to be.
Gary unpacks his detector and equipment, puts on his headphones, and sets about hunting. Within just a few swings a coin pops out. A penny from the 1970s. A forty-year-old coin, not valuable, but hey, it’s forty years old, right? The older stuff, Gary assumes, is buried somewhere nearby. He continues hunting. More 1970’s era coinage, some 1960’s, a random 1950’s coin or two. But no silver (1964 & earlier), no coins from the 1940s or 1930’s.
Gary takes a lunch break, frustrated and a bit puzzled. Where are the older coins he wonders? It’s obviously an old park. He surmises that he must be in the wrong spot and shifts his location to another side of the park. Several hours of hunting later, with a pouch full of 1970’s and newer coins and one solitary 1949 wheat penny, a worn-out Gary calls it a day and goes home. In his view, his day of coin hunting was a complete failure.
Now contrast Gary’s hunting experience to one that his buddy, Randy, had on that same day. Randy woke up that morning with the exact same goal in mind that Gary had: to dig some old coins.
But Randy had an advantage over Gary, a crucial advantage that would help him to potentially avoid Gary’s long and unsuccessful day of coin hunting. You see, the night before, Randy had remembered to do his homework. His research.
Now don’t go running away screaming thinking that research means a day at the library or many hours on the Internet. Don’t get me wrong, if you are searching for an old Civil War encampment, for example, a lot of research time may be required. But oftentimes just a few minutes will save you hours of wasted hunting time.
What did Randy do the night before? Once he decided that his goal for the next day was to find old coins, Randy knew that he had to find a location to hunt that offered the possibility of finding older coins. He knew about the park that Gary had hunted but chose to avoid it. The reason? It was built in 1976. Randy knew the odds of finding older coins, say from before 1960, were slim, due to the age of the park. Probably information that would have been useful to his friend, Gary, correct?
Randy also knew of another park in the same neighborhood that he thought might be promising. It was an older park, but he wasn’t sure how old. After a quick trip to the Internet and Randy discovered that the park had been built in 1932. He even found a couple of old photographs of the park from the 1940s during his electronic search which he printed for reference.

Picnic Area
Let’s fast forward to the next morning. While Gary is pursuing his pipe dream at his 1970’s-era park, Randy has arrived at the park he selected. Before he even unpacks his detector, Randy takes his photographs of the park from the 1940s and compares them to the current configuration of the park. Noting that the picnic areas had apparently been relocated over the years, Randy elects to hunt a now vacant corner of the park that used to be the picnic area.
Several hours later while Gary is fumbling through his equipment bag looking for his aspirin, Randy is calling it a day as well. However, he is ending in a much different way. Rather than looking for a bottle of pain reliever, Randy is examining the six SILVER coins he has in his pouch. Two Mercury dimes from the 1930s, a 1959 Washington quarter, a 1964 Roosevelt dime, and a 1942 War Nickel (35% silver). Those along with several wheat pennies and some modern coinage. Randy’s day is a perfect example of successful coin hunting, wouldn’t you say?
In the same vein, location can greatly affect the success potential of the coin hunter whose goal is just to dig a lot of coins regardless of their age. Pick a huge expanse of open grass area that never has had much human traffic and a long day coupled with an empty finds pouch are in your future. However, find one where you can verify that it has been occupied by people at some point in time, hopefully, significant numbers of people, and the odds of your digging coins all day are going to be pretty high.
The main point here is that in order to be a successful coin hunter, selecting the location to hunt is going to be the single most important decision you make any time you go out in the field.
So let’s assume you have selected your coin hunting goal for your day in the field and an appropriate location to hunt. The next step is to equip yourself.
Equipment:
Of course, coins can be found anywhere, from the coast to inland areas. For the purposes of this guide let’s focus on inland; beach hunting requires equipment specially suited for the beach and is covered in a separate guide on the Kellyco website.
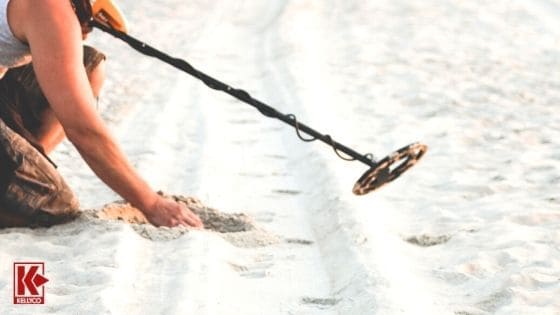
Beach Hunting
The first, and of course, the most important piece of equipment required in order to become a successful coin hunter is a metal detector. There are models of every make, model, type, and budget available that in the hands of an even modestly experienced detectorist will find coins. My advice is to determine how much you have to spend before you go shopping for a machine. There are many fine machines available in a variety of price ranges that will yield good results in the field.
My personal preference is to have a detector that is lightweight and easy to swing, and also has a visual target ID. Some hunters prefer to just go by sound, but I like having the visual target reference and also a depth gauge to tell me approximately how deep I have to dig. Most if not all coin hunting detectors feature discrimination circuitry which I consider vital if you are going to be a successful coin hunter. Discrimination is a setting on a metal detector that allows you to accept, or reject various targets. It increases your chances of digging more coins and less trash when used properly. If you are hunting an area that is filled with trash targets (aluminum foil, bottle caps, pull tabs, etc.) you will find discrimination to be an indispensable feature of your detector.
Once you have selected a metal detector to use to hunt for coins, you need to take a moment to consider the type of coil (or coils) with which you want to equip your unit. Most metal detectors come with a general use coil, or stock coil, that is suitable for most hunting situations. They come in two different configurations: concentric or double-D. These terms refer to the method whereby the coil windings are laid into the coils. Concentric coils create a conically shaped field that is emitted from the coil while double-D coils produce a knife-edge sort of pattern. Both coils work well in coin hunting situations and you can’t go wrong with either. If you are considering a new detector purchase, be sure to inquire as to the type of coil that is included. Generally, you will find it is the type that the manufacturer has determined is best for optimizing the performance of the metal detector.
I would strongly urge you to look into purchasing a small coil once you get proficient as a coin hunter. The added flexibility of a small coil is a great asset in very trashy parks due to its smaller profile. A small coil will oftentimes enable the hunter to separate signals that would have been masked by a larger coil. Further, a small coil will permit you to get closer to fence posts, navigate tight spaces, and the like that would not be searchable with a larger coil.
A good pair of headphones is also vital. Target ID is great AFTER you get a signal; your ears are your first, and often best, part of treasure hunting equipment. Don’t short change yourself with cheapies. Get a good, solid pair that seals out the outside, ambient noise and lets you focus on hearing target signals clearly.
Recovery Tools:
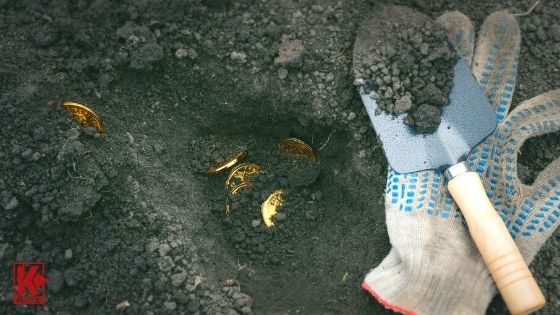
Recovery Tools
I believe in traveling light but carrying everything I need.
My list is a shortlist but I never go into the field without these items on my person:
- Gloves and Knee Pads: Optional but if you want to save your hands and your knees get some.
- A Drop Cloth: Too many hunters don’t take this simple, inexpensive item into the field and we all suffer for their negligence. A drop cloth to put the plug you cut and the dirt that you remove from the hole allows for neat, clean target recovery.
- A Pinpointer: Outside of your metal detector, a pinpointer is the most indispensable item that a coin hunter can own. Not only will one make target recovery easier, but if you are lucky enough to find an old coin, having a pinpointer will lessen the chances of your damaging a valuable find.
- A Tough Finds Pouch and Belt: There are many makes and models to choose from, my preference being a nylon pouch with several zippered pockets that I slip over a nylon diving type belt. While there are leather belts and pouches available, I like the fact that nylon doesn’t absorb water and is very easy to keep clean.
- A Top Quality Digging Tool: Target recovery of coins begins and ends with a hand digging tool. You open the hole cleanly with it and also fill the hole so as to make the ground look undisturbed. Choose a good quality one, preferably steel; even the toughest plastic won’t get the job done if the turf is hard. I prefer one with a serrated edge on one side which is especially helpful if the area you are hunting in has roots that require cutting through. You should also consider one with a blade guard that will protect your hand from slipping.
A Few Tips:
- Don’t let a lack of time limit your coin hunting enjoyment
- Just because you can’t hunt for several hours or more, don’t just leave your detector in the closet. When time is short I’ve often hunted at a favorite park for just an hour or so and have made some good finds within that 60-minute window.
- Cherry-picking isn’t a bad thing, especially when you have limited time. Use your discriminator to your advantage. If you are in an area that has old coins, say silver or wheat pennies, crank up your discrimination setting to knock out the lower signals. Yes, you will lose nickels and maybe a gold ring, but you won’t spend the hour digging tons of trash and you may just hit some cool old coins.
- Old coins are what we all hope to find, but don’t be a clad snob. Those pennies, nickels, dimes, and quarters add up. I have a coin jar that I put all of my clad coins into and once a year I tumble them (a decent rock tumbler works just fine). The extra dollars I receive when I cash the coins in sure comes in handy for a little extra spending money (usually a trip to Vegas in my case!).
- Modern metal detectors are excellent at providing accurate target ID on coins. Spend the time air testing a variety of coins with your metal detector and really work on committing their signatures to memory. Armed with this knowledge, you will amaze yourself at how adept you will become at identifying good targets, and ignoring junk/less desirable targets when you are hunting in the field.
Final Thoughts:
That day at my grandparents’ house in 1972 was a long time ago for me but it truly seems like just yesterday. Maybe the thrill of digging a coin in 2013 isn’t quite the same as it was for me 41 years ago, but I’m not lying to you when I say that it’s still a kick to dig a coin that I find with my metal detector. I hope that this guide will lead you to enjoy coin hunting as much as I do and that the tips and strategies I have shared with you will result in many successful coin hunting ventures for you in the future.
Recommended Equipment
- Coin Hunting Metal Detectors: Relic Metal Detectors and Gold Metal Detectors
- Digging Tools: All Hand Diggers, Garrett Edge Digger, Sawtooth Gator Digger, and Razor Edge Gator Digger
- Pinpointers: All Pinpointers, Nokta RS Pinpointer, Electronic Pinpointer, Garrett Pro Pinpointer II, and Minelab Pro-Find 25 Pinpointer
- Pouches/Belts: All Pouches/Belts,
- Gloves: All Gloves
- Knee Pads: All Knee Pads
- Headphones: All Headphones
- Books: All Books and Coin Hunting Books
Metal Detectors Can Make You A Successful Park Hunter
an Old Coin at a Park
Most everyone is familiar with the game show Family Feud and its well-known catchphrase “And the survey says…”
Let’s apply Family Feud to the hobby of metal detecting. If one asked the question “Name the most popular area that a metal detectorist would hunt” what do you think the #1 answer would be?
What would you guess? Schools? Old houses? Urban renewal sites? The beach? Or would you perhaps guess “a park?”
And the survey says… the #1 answer is… A PARK!
Without a doubt, I can’t imagine any person who has owned a metal detector and actually used it who didn’t venture into a park to hunt at least once, and probably many more times. Parks offer everything that a metal detectorist is looking for in a site:
- People
- Activity
- Free Access
- History (potentially)
- Constant Deposits of Lost Items
Think of it as a math equation of sorts: people + activity +items lost = VALUABLE FINDS. And even better yet, it’s free, requiring no permission or fees.
So why doesn’t every treasure hunter who owns a metal detector just go hunt parks and rake in the finds? Well, as with anything, there is no such thing as the proverbial “free lunch.” Hunting a park is no different. Before we get to approaches to park hunting that can increase your odds of making good finds and having an enjoyable day of hunting, let’s take a look at parks in general from a treasure hunter’s point of view.
Park Characteristics
As mentioned above, parks can offer an ideal environment for a treasure hunter to swing a metal detector.
Free Access
Drive up, park, pull out your gear, and hunt. Couldn’t be simpler, right?
Well, yes and no. At a small, empty local park this might be a workable strategy, given that there is only so much area to hunt. However, I have hunted parks that range in size from a few hundred square feet to hundreds of acres, and in most cases, drive up and hunt doesn’t work unless it just happens to be your lucky day.
History

Old Park
Parks have existed for as long as a civilized society. Communal places where people can be outside and enjoy recreational activities. If older finds interest you, what better place to look for them than an old park, say pre-1964 (the last year silver coins were minted) or older?
Well, once again the answer is a definite “maybe.” Our modern-day world can be very efficient at maintaining a historical look while erasing its actual history. Think of old buildings that feature historical facades but have all of the accouterments of our technology-driven lifestyle within them, things like wifi, computers, sensor-activated indoor plumbing, etc. Historical parks are no different. Original dirt may have given way to fill dirt, with all of the valuable items either buried too deep for a metal detector to locate or long gone in the bed of a dump truck. Classic structures like stone walls or picnic tables may have been replaced by replicas. Kids’ play areas may rest atop an old ball field. That pre-1964 park may in fact be a post-2010 park and you wouldn’t even know it until you had spent a frustrating day digging nothing but modern trash and clad coins.
People, Activity, Constant Deposits of Lost Items
Let’s consider the last three park characteristics together and assemble them once again into an equation: people + activity +items lost = VALUABLE FINDS.
The equation holds true. It happens in every park in the world. At some point in time, someone is going to do something at a park and lose a valuable item.
However, there is another equation that comes into play at a park, perhaps more than any other hunting location you will ever visit. This equation is as follows: people + activity = TRASH.
Mountains of the stuff. Deposited every day at your local park by the ton. Bottle caps pull tabs, cans, foil, nails, screws, wire, twist ties, broken sprinkler parts, construction debris, the list is endless. And all of it is metal. Then add the fact that thanks to our friend the lawnmower, this carpet of metal trash is further distributed by the blade of the mower as what is referred to as “chop.” Tiny bits of metal that can ring true to the best of metal detectors, can also mask or hide good finds that pass right underneath your search coil.
My God, Why Would Anyone Hunt A Park?!
Acres of potentially random ground, eradicated history, and mountains of trash? Sheesh, better just to go to a landfill with a metal detector and hunt there, right?
Well, it isn’t quite that bad. With a strategy designed to minimize the impact of factors beyond your control, parks can be consistently rewarding hunting sites for a metal detectorist. It just requires a small amount of prep work combined with good old-fashioned common sense.
Park Hunting: An Approach That Works
Let’s take another look at those park characteristics with the goal of making them work to the advantage of a metal detectorist.
Free Access
Large or small, deciding where to hunt at a park should not be a daunting task. There are two key steps to take: evaluating the site and then testing your evaluation.
Evaluating the Site

Soccer Field
When you pull up, leave your gear in the car and take a panoramic view of the park. Note key areas like ball/soccer fields, picnic areas, and places where folks might set up camp so to speak (tree- shrouded grassy areas, for example). Pick one or two spots to focus on. Then unpack your detector and head for one of those spots.
Testing the Site
What you are looking for here is a quick assessment of the potential of a particular area to yield good targets. If you use a detector with a discriminator it is a real advantage here. Swing your detector and listen for tones/watch for target ID’s that are in the range where you find good targets. Evaluate those versus the number of trash targets. Dig a few good tones/ID’s to see how deep finds are and if they are what you had hoped to recover. If the answer is “yes,” hey, keep going. If on the other hand you aren’t getting many good signals or the trash is overwhelming, move over to the other area(s) you have identified and apply the same test.
I have used this method for many years and it works well for me. Sometimes I hit right off the bat and just hunt the first part of the park I arrived at; other times it takes several excursions before I settle in to hunt.
An example might help here. My buddy, Frank, and I identified a local park we had never hunted before that was built in the 1930s. Wanting to find a park that held the potential to find old coins, we had been looking around for an older park to hunt. This one, on paper, seemed to fill the bill.
Frank decided to scope out the park before we committed to a full day hunt and he applied the evaluate/test method that I outlined above. It worked to perfection. Frank discovered that, although the park was old in terms of its creation, its actual history was recent. There had been obvious landscaping performed which more than likely included the dreaded “fill dirt.” He only found sporadic modern coinage amidst a heavy layer of trash. Not what we were looking for as a potential site to hunt.
Once you have evaluated and tested a site you now need to see if it fits your detecting goals for that day in the field.
History
The history of a park will always affect your hunting goal(s). Let’s say that you’ve evaluated a particular park and your brief testing has indicated that it potentially contains promising targets. Time to get going, right?
Not necessarily. If your goal for the day is to dig old coins, then several hours of digging modern coinage may not be to your liking. Similarly, if you are just out to hunt coins in general and find that there are a few good targets to dig but they are old and deep, you may not be satisfied with just a few Wheaties and a silver dime in your pouch at the end of the day. Keep that in mind when you strategize a park and if it doesn’t appear to meet your goal requirements for that day, consider shifting gears and take a different approach or leave and look for another site to hunt.
People, Activity, Constant Deposits of Lost Items

Lost Watch
The park is right. Its history is to your liking and meets your target goals. You’ve identified areas to hunt. It’s time to detect.
You turn on your detector, set the discrimination to a low level so you don’t miss the good stuff, and start swinging. Within seconds the detector sounds off. Your first target! Yes! You start to pinpoint the signal when suddenly another signal appears. Wow, you say, two targets in the hole! Awesome! You move your search coil to separate the two targets and another signal sounds off in your headphones. Followed by another. And another. You stop and wonder what the heck is going on. There simply can’t be that many good targets in such a small area.
And you are dead right.
Remember that carpet of metal trash that I mentioned earlier in this guide? Well, you have just confirmed its existence. But before you wrap your detector around a tree and look for another hobby, stop and take a look at your metal detector. Because all is not lost. You have a weapon built into your machine that will save your hunting day: the discriminator.
Simply increase the discrimination until most of those annoying trash sounds disappear while your high sounds (those good targets) remain.
Now the “all metal all the time lobby” may be rising up in opposition to this method, arguing that you could miss a valuable signal such as a thin gold ring, which often times has a signal that is similar to that of a piece of foil. And they would be correct, to a point. I have been hunting parks for over forty years and I have found it impossible to hunt trash filled parks with minimal or no discrimination. My detector becomes very noisy and even if my ears are especially keen, the amount of trash one must dig in the hope of finding a gold ring is overwhelming. I will dig signals in the nickel range, which at times can indicate a gold ring, but if gold is my goal, I pursue it at the beach. The amount of digging I would have to do if I use low/no discrimination is just more than I am willing to do with the limited time that I have available to metal detect. Not to mention that digging trash all day really isn’t much fun. So I focus on coins (high tones) and low tones in the nickel range and generally do pretty well in my park hunts. I have been rewarded with many nice coins and even a few pieces of gold using my “dig nickel signals” strategy.
Equipment:
at a Local Park by Frank Galuppo
One of the nice aspects of park hunting is that it does not require a large investment in order to get up and running. Yes, you can get all of the bells and whistles on a detector and all of the high end gear that goes with it, but you can be very successful in your park hunting endeavors by purchasing just a few basic items.
Obviously one needs a metal detector. I prefer a model that is light and easy to swing, with both visual and audio discrimination. Detectors of this nature really make hunting simple and enjoyable, with some models offering special audio/visual enhancements that make good signals stand out. A number of Garrett Metal Detectors models emit a special “bell” tone on certain good targets that quickly becomes music to one’s ears.
There are two types of coils that come standard with a metal detector, concentric and double D. The difference is in how the coil windings are laid into the coil. Concentric coils produce a conical shape field while double D coils have a more linear pattern. I have used both and find that they can perform equally well in a park environment. All metal detectors come with standard, or “stock” coils that are specifically designed to perform with the detector to which they are mated. When you are purchasing a new detector, be sure to inquire as to the type of stock coil that it utilizes.
I would strongly suggest the purchase of a small coil to go along with the stock coil provided with your machine if your goal is to hunt parks.
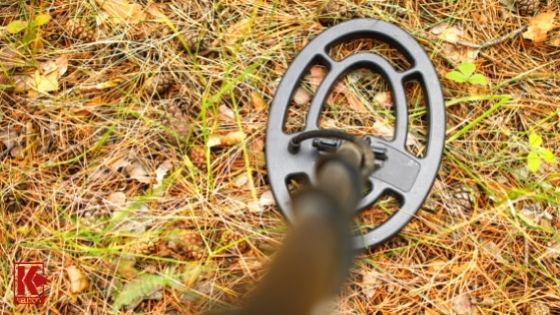
Metal Detector Coil
In very trashy parks, the small coil will become a dependable option that will allow you to glean good targets out of the trash due to its smaller profile. I have used small coils for years in what I refer to as my “second wave” of detecting at a site. After working an area of a park with the stock coil on my detector, I switch to the small coil and rework the same area. The reduced footprint of the small coil is like having a second set of eyes and this approach has yielded many good finds that were missed by the stock coil. Additionally, a small coil can take a supposedly hunted out park and make it viable again if it has only been searched with larger coils.
Lastly, let’s not forget about headphones. You need to be able to hear the good targets and also identify the bad ones. In a park, a good pair of headphones will provide you with a double advantage: it will shield your ears from outside noise, and it will also keep your audible hunting experience private, away from the ears of other folks in the park. Hunt just one time by your detector’s speaker and you will see what I mean.
Recovery Tools:
Because parks are communal areas, shared and enjoyed by everyone, the choice of proper recovery tools is vitally important, perhaps more so than any other environment in which a metal detectorist will hunt. Responsible target recovery that has its goal the leaving of the landscape as it was found cannot be emphasized enough. While everyone who makes use of a park has a responsibility to keep it clean by not littering, picking up dog waste, etc., it is especially important that “the guy digging holes in our park” be extra aware of the importance of leaving the ground looking undisturbed.
Several years ago I arrived at a new park to hunt and was aghast at what I found when I did my initial evaluation of the grounds. The place looked like a minefield, with holes and divots of grass everywhere. I hoped the devastation was the result of gophers but knew what the cause was after inspecting a few of the holes: metal detecting. It looked like several hunters had hit the area hard, dug a bunch of targets and then left, not giving any thought to how the park looked. I spent the better part of several hours filling in the holes and replacing what plugs I could before opting to hunt in a different area of the park. Several weeks later I came to find out that a detecting club had held a club hunt at this park. It is this behavior and lack of respect for park grounds that, if left unchecked, will result in legitimate hunters being banned from hunting local parks. So with being said, choosing the right recovery tools AND using them properly are very important things for park hunter to keep in mind.
The basic items required:
- Knee Pads: Your jeans or bare knees will love you for this.
- Gloves: Your hands will take a beating without them. A must as far as I am concerned.
- A Finds Pouch and Belt: Get yourself a nice one, preferably with several pockets to put your tools and finds in.
- Bug Spray: Grass brings insects and they can ruin a hunt. A handy tip is to spray bug spray under the bill of your hat. It will keep the insects away from your face and works like a charm.
- A Drop Cloth: Once you remove the plug of grass, be sure to have a drop cloth laid down on the ground on to which you can dump the dirt that you remove from the hole. This makes for a nice, tidy clean up, with no dirt remaining on the surrounding grass.
- A Hand Digger: One specifically designed for metal detecting; gardening tools stay at home. You want a hand digger that cuts a nice, clean plug, one that can be easily put back into place once you recover your target. Steel is the best choice here, and find a digger with a serrated edge to make cutting a plug easier.
- A Pinpointer: Absolutely vital. Locating a target in a hole without one is laborious, time-consuming, and could cost you some $$ if you scratch a valuable coin in the process of digging. Also, a good pinpointer will allow you to dig smaller, more target-directed holes, minimizing your impact on the park grounds.
A Few Tips:
- Please remind yourself constantly about the importance of being a good citizen when hunting parks. Honestly, be an extra good citizen. As metal detectorists, we want to be considered a part of the park experience, not a threat to it.
- If conditions are very dry in your area, don’t hunt your local parks. Period. You will kill the grass and raise the ire of park goers and groundskeepers alike. Wait until a few periods of rain return moisture to the ground so that those plugs of grass you dig can take root again and remain alive.
-
Leave The Ground Looking Undisturbed
If a park is busy with activity, look for an empty area to hunt, or come back another day. The last thing someone needs is a guy digging holes in an area where people or pets are at play.
- Pay extra attention to removing all recovered (and eyeballed, for that matter) trash as opposed to simply discarding it and moving on. This gains you significant goodwill with people in the parks and I have benefited from this many times.
- Even though many parks are 24-hour parks, hunt only during the day. Having guys creeping around in the dark at night in a park alarms neighbors. I know, I know, go figure, but I’ve met hunters who prefer to hunt at night and they are always shocked when someone calls the cops on them.
The Last Word on Park Hunting
You will not find a better, more suitable, more easily accessible area to metal detect than a park. Parks can be a way to spend a spare hour of your day, or the focus of a road trip or even a vacation; it’s all up to you. Add the tips discussed in this guide to your metal detecting knowledge base and I think you will find park hunting to be a very enjoyable, and profitable, type of treasure hunting.
Recommended Equipment
- Park Hunting Metal Detectors: Top Selling Metal Detectors
- Recovery Tools for the Park: Pinpointers and Digging Tools
- Other Equipment: Gloves, Knee Pads, and Headphones
- Books: Treasure Hunting Books
Best Metal Detectors To Use In Cities
(How To Be A Successful Urban Treasure Hunter)
You may be wondering “What exactly is ‘urban’ treasure hunting?
The word “urban” is defined as: “of, relating to, characteristic of, or constituting a city.”
So one could simply say that “urban treasure hunting” is really treasure hunting within a city.

Urban Treasure Hunting
I have lived in, or nearby, large cities my entire life, and I often run into detectorists who are intimidated by what they perceive to be the limitations of detecting in a city environment. Often the questions revolve around two basic misconceptions. The first is that cities are for the most part covered in concrete so all of the good stuff is only reachable with a jackhammer. The second is that the few detecting areas that are available to hunt, like city parks, are and have been searched hard for years and simply aren’t worth hunting.
One might surmise, therefore, that urban treasure hunting is a rather fruitless and frustrating part of our hobby that isn’t worth pursuing. Better to get in the car and drive to the suburbs or the country or the beach if you are near a body of water, right?
Well, it is exactly this type of thinking that works to the advantage of the savvy detectorist who, with a little ingenuity, some really basic research and the help of good old Lady Luck, can become a very successful urban treasure hunter.
Let’s delve into this in some detail by addressing the two misconceptions that I mentioned above.
Cities are for the Most Part Covered in Concrete
This really depends on where you live, or more importantly, where you intend to hunt. Yes, there are extremes. For example, New York City, with its high population density, is certainly covered in a blanket of concrete and buildings while Los Angeles is a sprawling metropolis that covers a huge expanse of land and has a lot more potential “non-concrete” areas to hunt. Perhaps the urban area you reside in, or want to hunt, is similar to one of these two cities. Most likely it is somewhere in between.
However, the simple fact to keep in mind is that no city is solid concrete. Every city has patches of grass, or dirt, either on public or private land. A good friend of mine lives in a very old apartment right in the heart of New York City. And guess what you walk right out into when you open his back door? A small yard. No larger than 10’ X 10’. Mainly dirt with a clothes line he hangs his laundry on. And to his knowledge no one has ever swung a metal detector over that turf. Guess where I am going next time I visit him?
And speaking of New York City, on that same visit there was a great deal of sidewalk construction going on in his neighborhood. The old concrete sidewalks were being removed to allow for new concrete to be poured. There were several days where the bare dirt was just sitting there, waiting to be hunted, before the cement trucks came in and covered up what could have been potentially virgin ground.
So if a crowded, overbuilt, compressed city like New York could offer sites like this to hunt, I think it is reasonable to assume that similar opportunities exist across the country (and around the world for that matter).
Okay, you say, maybe there is some potential within a city like New York. But how on earth can a mega-metropolis like Los Angeles offer the urban treasure hunter the opportunity to swing his detector and find cool stuff? I mean, it’s so huge, how do you know where to start? And where to go? And how far to drive?
My advice is to start right where you are, whether you are visiting or live in the area. Much like New York but on a broader scale, you will find yards to hunt and sidewalk construction. And given the size of Los Angeles, you will find a whole lot more of both. Apartment complexes with small grass courtyards; houses being landscaped/torn down/renovated; miles of sidewalks being replaced continually over the course of a year. All available to the urban treasure hunter. The neighborhood that I live in falls within the confines of Los Angeles and the houses date back to the 1930s. When my neighbors do landscaping or construction, which is frequent, they are more than happy to allow me to swing my detector over the bare ground.
This past year, a house on my street was sold and then left to sit abandoned for several months. The lawn died and all that was left alive were a few old rose bushes. A neighbor of mine asked the new owner if he and I could remove the roses before they died and his response was basically “do anything you want back there.” So after removing two rose bushes I decided to bring my detector over to check the old rose garden. Well, guess what? Three Wheaties and a worn Mercury dime later, I dug up an 1897 Peruvian silver dime that had been cut out and turned into a medallion! All from detecting a dirt patch that was less than 5’ X 5’!
Now let’s take a look at the second misconception.
City Parks are Hunted Out
A Typical “Sliver” Park
Yes, they are. Just like the ocean beaches are pounded.
Yet somehow hunters seem to keep finding things in these heavily searched areas. How can that be?
Okay, fresh drops are always a possibility, and they can occur anywhere. But let’s leave those out for a moment and concentrate on finds that have been buried for a while. Silver coins and the like. They should all be gone, right? Or at least so masked by an ever-growing trash layer that they simply aren’t capable of being located with a metal detector unless you dig a ton of trash and get really lucky.

City Park
Also true. But that is only if you go where everyone else goes. And hunt where everyone else hunts.
The open-minded urban treasure hunter sees this “saturation of detectorists” as a big advantage. Because his goal is to find the areas that other hunters have overlooked. I call these areas “sliver parks.” Not “silver” but “sliver” parks.
A V Nickel, a Buffalo and Two Wheaties Found at a Local Sliver Park
What do I mean by that? Almost every park I have ever been to has at least one small “sliver” that is removed from the main park. A little nook, a corner, a small sitting area. A “sliver park.” These are the areas to look for and they offer the potential to make great finds.
A couple of examples will illustrate my point. Here in Los Angeles, there are several huge city parks that have been hunted hard for years. Occasionally good finds are pulled out from these parks, often when landscaping has taken place (remember there are sidewalks and walking paths in parks, too!), but they are few and far between. One of these parks has a small “sliver” that was cut off from the main park, essentially a triangle of grass and trees. I had driven by it for years and never gave it a second thought. Then one day I decided to try hunting this “sliver” park and guess what? It clearly had never been hunted before. I pulled out an 1899 V nickel, a buffalo and 2 wheaties on my first hunt.
A 1936 Westinghouse Token Found at a Sliver Park
I also found one of my best finds ever, a 1936 commemorative token from the Westinghouse Jubilee of 1936, held in Philadelphia, PA, at the same park months later. My uncle worked for Westinghouse so the coin really hit home with me. How it got to Los Angles and was lost at a local park is beyond me!
So don’t give up on those urban parks. Just look for a “sliver” and if you find the right one the “silver” maybe there waiting for you.
Take a look around your urban area(s) and I will bet you there are similar detecting opportunities available to you!
Before we leave this portion of this guide to urban treasure hunting, there is one very important subject that needs to be mentioned.
That subject is SAFETY.
Hunting Partner Frank Galuppo Unearths an Old Coin from an Urban Park in Los Angeles
Remember that you are hunting in urban areas. Urban areas where crime does occur, and where you could be potentially very vulnerable to attack. Times are a great deal different in 2013 than the 1980’s and 1990’s when I hunted the parks and other urban areas in Los Angeles. If you are detecting any area in any city other than a private residence, I would strongly urge you to hunt only in daylight and only with a partner. And I would advise you to “case” any potential hunting site before you ever get your gear out of your car. A quick walk around or scan of the area to make sure the wrong folks aren’t hanging around could save your neck. If it doesn’t feel right, leave. I have been harassed in broad daylight at crowded parks and have had friends who went solo early in the morning and were creeped out to discover that they had been watched. A few coins aren’t worth being robbed or worse. Leave and come back another day. Or don’t go back and find yourself another place to hunt.

Scan The Area You Are Hunting To Ensure Your Safety
If you do find an isolated, unhunted area, like a sliver of a park, be sure there are people there or that you have a hunting partner or partners with you. Isolating yourself is an invitation to potential trouble.
Now that we have looked at the subjects of where to hunt and how to be safe in an urban environment, let’s get to some fun stuff like the sort of gear you will need.
Equipment:
The great part about being an urban treasure hunter is that you don’t need to spend a fortune on a metal detector in order to ensure your success. Even the most basic starter machine will find the good stuff if the location is right. As you run up the scale sophisticated options like advanced target/tone ID, ground tracking and the like can maximize the chances of your finding something good but they are no guarantee.
Me personally I like a lightweight detector that offers visible and audible target ID. Kellyco offers a wide selection of detectors and a short conversation with one of their specialists will guide you to what model is best for you.
Coil type is something you should give some serious thought to, both in terms of size and design. Remember that depth, while important, is not as vital a component of your success in finding good targets as you might think. Sure, having a detector that will find a buried silver coin at 14” would be great but digging 14” holes in a public park will both wear you out AND likely get you thrown out by a very irate groundskeeper.
Concentric and DD coils are often a matter of personal preference and a discussion of their pros and cons is better left to a Kellyco specialist or one of Andy Sabisch’s excellent “how-to” books. My advice in terms of coils is to seriously consider purchasing a small coil in addition to the stock coil that comes with your detector. If there is a great deal of trash in an area you are hunting, or if the conditions are such that swinging a larger coil is difficult, you will love the flexibility that a smaller coil offers. You can fit it into tight spaces or get much closer to metal objects like fences. Plus a small coil will cut through the trash much more effectively than a larger profile coil, possibly sniffing out a good target that was masked by trash. I was using a small coil on my detector when I found the 1899 V nickel mentioned earlier in this guide.
Of course, don’t forget your headphones. Keep it private (as in no audio to attract attention) and listen for the good stuff.
Recovery Tools:
The items required are basic but in my view absolutely necessary:
- A Sturdy Belt and Finds Pouch: I have had several “rigs” over the years, from fabric pouches on old leather belts to fancy nylon deals. I prefer hip-mounted pouches to aprons because they don’t get in the way when I bend over.
-
Hand Digger
A Quality Hand Digger: You need something that will “cut/carve” out a plug and also make removal of the dirt from the hole relatively easy. Garden tools don’t get the job done here. I prefer one with a blade guard to protect your hand from slipping. Get one with a sheath that you can slide onto your belt.
- Remember that proper target recovery and leaving the ground behind you as you found it is IMPERATIVE. The public face of our hobby requires that we are viewed as good stewards of the grounds that we choose to hunt, wherever they may be.
- A Drop Cloth: on which to dump the plug and dirt from your hole. Plastic or fabric, up to you. Makes for a nice, neat way to return dirt to a hole.
- A Pinpointer: Next to my metal detector, a pinpointer is the most useful tool for a metal detectorist ever made. After 20 plus years of hunting without one, I don’t know how I did it. You will do less damage to the turf and scratch fewer good targets if you purchase one of these. You can’t go wrong with the Garrett ProPointer II; it is on my belt every time I hunt inland.
- Knee Pads: Some guys use two, I use one (figure the second one is a spare) on the knee I kneel down upon. It will save your knee(s) and also your jeans.
- Gloves: Another must-have item. I like nylon or fabric with knit cuffs to keep the dirt out. They will save your hands as well as protect them.
Final Thoughts:
Hopefully, this guide has served its purpose, which is to let people in our hobby know that urban treasure hunting is a viable, fun and potentially profitable way to metal detect. If you live in an urban area or have one near to you, I would urge you to add it to your mental list of potential sites to hunt. Follow the tips I’ve discussed in this guide and you may be surprised what ends up in your find’s pouch at the end of the day!
Recommended Equipment
- Urban Treasure Hunting Metal Detectors: Urban Treasure Hunting Metal Detectors
- Digging Tools: All Hand Diggers
- Pinpointers: All Pinpointers
- Pouches/Belts: All Pouches / Belts
- Gloves: All Gloves
- Knee Pads: All Knee Pads
- Headphones: All Headphones
- Books: Treasure Hunting Books
Best Metal Detectors For Finding Relics
(How To Be A Successful Relic Hunter)
Even Simple Relics Can Tell a Story. Boy Scout Memorabilia, a 1940’s Baseball Buckle, a Long-Lost Lifeguard’s Whistle, a Padlock from the Early 1900s, and a Few Kids Toys All Open a Window to the Past. (Relics from the Author’s Personal Collection and Recovered on Private Property with Permission from Owner)
Barry is a successful relic hunter who through careful research has pinpointed the location of a long-forgotten Civil War cavalry camp a short drive from his home.

Relics Hunting
Obtaining permission to search the site from the current property owner, he used his handheld GPS unit to navigate through the woods to reach the site of the camp. As he scouted out the area the results proved that his research had been “spot on” as several nice period relics were soon recovered. As the sun began to set over the nearby ridge hours later, Barry started to hike back to the truck with a pouch filled with relics. Each of his finds that included bullets, buttons, coins, and bridle pieces had a story to tell and their recovery allowed history to be preserved. A week later Barry brought his finds to the monthly meeting of the metal detecting club he belonged to and the reaction from fellow club members was almost predictable. Many of the members searched for Civil War relics in the local area; however, with the exception of an isolated bullet or two, it seemed that Barry was the only one that was able to find decent artifacts with any regularity. If this sounds familiar, then this guide is for you.
So what exactly is relic hunting? It is actually the most diverse form of treasure hunting in terms of the types of targets that hobbyists seek and unearth. You don’t have to live in an area containing Old West ghost towns or historic military battlefields to be a relic hunter as relics can include virtually anything ranging from everyday household items to mining equipment, military gear, wagon parts, trade beads, horseshoes, early American settler artifacts…simply add any item you can imagine to the list and there will probably be someone out there looking for and finding it with one of today’s metal detectors. Anywhere – and that means anywhere – people have been, lost relics are just waiting for detectorists to find, recover, and preserve their story.
Relic hunting was the first “recreational” use of metal detectors. Many of the ‘ole timers used surplus World War II mine detectors beginning in the late 1940s to locate artifacts from Civil War sites, pioneer trails, mining camps, and the like. Despite the limitations of this early equipment, countless relics were in fact recovered and found their way into museums and other collections for others to enjoy. When the first detectors with ground balance circuitry were released in the 1970s, many sites that were previously un-huntable due to high mineralization were searched effectively. Some relic hunters reported that the problem back then was not finding a site to hunt but rather being able to carry all of their finds back out at the end of the day. I’m sure we all wish we had problems like that today! Many of the well-known sites have been hunted for more than 40 years and, while no site is ever completely hunted out, finds have become few and far between. Before you get discouraged and give up relic hunting without even getting started, take heart, as there are hundreds of sites remaining that have never been searched with a metal detector. Selecting the right equipment, conducting the proper research to lead you to these locations, and then using the right search techniques will allow you to find what others have missed. Let’s take a look at what you need to be successful in the field regardless of the type of relics you might be seeking.
Equipment:
None of the manufacturers today make a bad detector but certain brands and more specifically, certain models stand out from the crowd when it comes to specific applications.
Cannon Balls
The key factor for most relic hunters will be the overall detection depth afforded by a particular model and the one that goes the deepest will often be the one that finds the most at the end of the day, especially at sites that have been hunted for decades. Since relic hunting tends to be an all-day activity, finding a detector that you can hunt with for extended periods of time without discomfort should also be a prime factor to consider. I know several veteran relic hunters who purchased detectors that were ideally suited for the conditions in their areas; however, they had to switch to a different model due to being unable to hunt with it for any length of time. Weight and ergonomics should be high on your list of factors to consider if you intend on spending a good part of the day in the field. Another factor to consider is the overall design of the detector. If you have to hipmount the control housing to be able to use it for extended periods of time or it requires that the battery pack be attached to your belt, is this really going to work when you’re slogging through thick underbrush a mile or two from where you had to park your vehicle? Several detectors now offer wireless capabilities which make it easier to hunt overgrown areas.
Interchangeable coils are a must when selecting a detector for relic hunting and you should see what the largest coil is that can be used on the detector you are considering. Larger coils allow you to cover more ground with each sweep and are invaluable when trying to find a possible site among acres of fields or woods plus they detect targets deeper than stock coils. On the other hand, once you find a site, a smaller coil may enable you to find relics in between trash or amongst rocks or fallen trees that a larger coil might otherwise miss. See if there are after-market coils available as the additional choices will greatly expand the versatility of any model you might be looking at. Kellyco carries optional coils from both the metal detector manufacturers as well as third party suppliers for many of the brands and models they stock.
Finding Sites to Search:
Once you have the right equipment, you need to have sites to search that holds the relics you are hoping to find. A good way to start is to pick up some of the books covering the period you are interested in which can provide leads to sites that may be near your home. Remember that if they are described in widely-distributed, popular books, the sites will probably have been searched by others before you but with the right equipment and techniques, you can find what others have missed. Kellyco carries several books and maps that will help you locate sites in your area to get started with. Local research is what will put you onto sites that few if any detectorists have searched before which are what we are all hoping to find. Libraries, historical societies, and regional museums are all sources of research material that can help you zero in on potentially productive sites. You will find that with a few targeted questions, the librarian or historian is often more than willing to talk about the area and you may find several sites being offered with little effort on your part other than listening to the conversation. Don’t forget about long-time residents as they can tell you where buildings once stood, what changed when highways were built and even stories they heard from their parents or grandparents as they were growing up. In several instances, I was told about a Civil War campsite, old mine, or hermit’s shack from an older resident that turned out to be very productive yet was not documented in any book.
A Few Proven Tips to Put Into Practice When You Are Looking for Sites Include the Following:

Find Areas Near Streams
- People and livestock required water so camps, settlements, and even isolated homes would typically be situated near a source of water. When you are looking over a map, pay particular attention to areas near streams, lakes, or rivers that would have provided a source of water. If settlers or troops had a choice, they would try to set up home or camp as close to the water as possible.
- Military commanders tried to setup vantage points on high ground. If you are searching for a camp or battle site, see if there is high ground in the area. Even if most of the activity occurred in the lower areas, troops would have been stationed on the higher ground as lookouts or to direct the course of the battle and often these sites have not been hunted to any degree.
- Relic hunters often focus on specific sites like battlefields, settlements, or ghost towns. Keep in mind that the people or troops had to move from point ‘A’ to point ‘B’, and unless there were railroads available, they walked. If you can pinpoint two locations on a map, try to determine the most likely path that they would have taken between them. Does the route pass along a stream or river? If so, they may have stopped for a rest and to collect water. A number of outstanding finds have been made by relic hunters searching sites that by all accounts should not have had anything since there were no camps or battles in the area; however, those passing through lost artifacts that were waiting to be found.
With the increased competition among relic hunters today, research is the key if you want to be successful. With a little effort, you will be able to locate sites that have not been heavily hunted and you may in fact be the first relic hunter to visit the site.
Ok, It’s Search Time:
Your research should have helped you identify several potential sites to search. There are a number of tips and techniques that can help you find more in less time, which should be your overall goal. It’s surprising how often relic hunters who have taken the time to conduct research and locate sites do not have a formal plan or method to actually search the site once they arrive. As they say “Even a blind squirrel finds a nut once in a while” but hoping for the best will rarely ensure you will be successful on a regular basis. The following tips have been honed over time and will help you find more in less time when you are out relic hunting.
- Use the least amount of discrimination possible. As the discrimination level is increased, the potential for a rejected target; i.e. one below the setpoint of the selected discrimination, to override the signal from a good target also increases. If the signal from the rejected target is stronger either because it is shallower or larger than the good target, you may not receive a signal from the target you are hoping to find. This is why many heavily hunted sites are still producing valuable relics for hunters who are willing to dig a little more trash in order to be sure they do not inadvertently miss a “keeper”. The actual discrimination level you use in the field should be selected based on the amount of trash present and how much “patience” you have at the time which can and will change from day-to-day or site-to-site.
- Try using different search coils to hunt the sites you know have produced in the past.
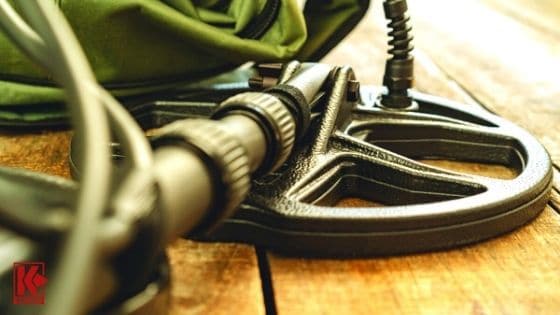
Try Using Different Search Coils
As discussed earlier, each coil has an advantage. At times, simply changing coils can uncover artifacts that were undetectable with the coil that came with your detector. Successful relic hunters often bring two or three different coils with them so that they have the flexibility the different sizes provide.
- If you gain access to a field that is still being farmed on a regular basis, plan to revisit the site after it has been tilled. Artifacts that may have been beyond the detection depth of your detector or situated at an angle that prevented it from being detected may now be easily located. Productive fields can be hunted year after year with a continual harvest of relics being recovered. If you hear about a field that produced relics years ago and is now thought of as being “hunted out”, get permission and head over there at the first opportunity to see what is still waiting to be discovered.
- Keep an audible threshold on your detector. If your detector has a search mode with an audible threshold, try using it when relic hunting. Unless you are hunting in all-metal, when you pass over objects that fall within the area(s) you have opted to reject, you will hear the threshold disappear or null out. Often if you are looking for a campsite, home place, or skirmish area, the first indication that you are in the right location will be ferrous items such as nails, tacks, or small pieces of rusted iron. When you come across signals that null out, slow down, tighten up your search pattern and see what turns up.
- Most pre-1900 sites contain a lot of ferrous targets such as nails, boot tacks, horseshoes, tool parts, iron pins, etc. Even if you are not interested in digging up all of these targets, the fact that they are present can help you find the right location to tighten up your search pattern and start recovering the relics you are hoping to find. Let’s assume that your research has identified the existence of a small campsite or long-lost settler’s cabin. You have determined the approximate area where it was located; however, it would take a considerable amount of time to thoroughly cover the entire 10 to the 20-acre area. In this case, the best way to try to pinpoint the campsite is to set your discrimination as close to ‘0’ as possible and simply walk back and forth across the area. Once you start to find a concentration of targets, slow down, and start working a more formal pattern to ensure you don’t miss anything. Remember the previous tip of using minimal discrimination as you search to ensure a rejected target won’t keep you from detecting a good target located nearby.
- Fire pits are another area worth trying to find when searching campsites or even settler’s cabins. Campfire pits were not only used for cooking. Trash was often tossed into the fire at the end of the day. Much of what is recovered from fire pits shows signs of being in the fire; however, a number of first-rate finds have come out of them. This is another reason why you want to search for camps with very little discrimination. A fire pit will usually contain ferrous trash and non-ferrous trash so even the slightest amount of discrimination will cause you to miss a potentially productive area.
- Once you’ve located a camp or cabin site and searched it, don’t be too quick to head on to the next one. If it was occupied for any length of time, they would have found an area a short distance away to get rid of the trash. It is human nature is to carry the trash to a spot downhill. After all, if you had the choice of carrying trash uphill or downhill what direction would you choose? You can either walk the area yourself or spend a few minutes looking over a topographical map and using one of the aerial map websites on the Internet to identify potential dumpsites. A few fellow relic hunters I know actually use their smartphones to look at maps real-time in the field to figure out where to search next – leverage today’s technology! Remember that yesterday’s trash is today’s treasure. Items such as belt buckles with broken pins, threadbare clothes, and other items that could not be salvaged were typically discarded with the daily trash – any of which would make a welcome addition to your collection.
Recovery Tools:
Unless you are searching for shallow relics in a grassy area, you will need a tool that can reach down to where the relics will be found and do so without bending after a few holes have been dug. Many times the soil will be rock-hard which will truly put any digging tool to the acid test. Saving a few dollars in buying a lesser-quality tool will quickly turn into an expensive mistake when you find yourself a long way from your vehicle with the digger you just bought bent or broken in half…and I’ve seen it happen more times than I care to remember to fellow relic hunters. You know it will usually take place when you are in a great site and have been given permission to hunt it one time only. Most relic hunters use a shovel or spade designed to provide years of service in all types of soil conditions.
Relic Hunters Use A Spade
Typically constructed entirely of metal, the only real maintenance that might be required is to occasionally sharpen the edge so you can cut through roots or vines often found in wooded sites. Other options you might want to investigate include folding military shovels (just make sure you get a true surplus shovel and not an imported look-alike that rarely holds up), a hand-help pick (again, get one that is solidly built) or an all-metal gardening tool that works in your ground conditions. A handheld digger is also a necessity as a shovel will not be able to extricate finds from under large rocks or thick roots. An electronic pinpointer is another handy item as it can keep you from damaging a relic that may be wedged into a tight area or in a hole with multiple targets. These pinpointers also reduce the time it takes to find a small item in loose dirt and at the end of the day, the quicker you find each target the more you will have in terms of finds.
Summary:
Take a minute and look around your own area, delve into the local history and see just how many different types of relics are waiting to be found within a short distance of your house.
Recommended Equipment
- Metal Detectors: Relic Metal Detectors
- Shovels: All Shovels, D-Handle Shovel, Sampson T-Handle, Relic Hunter Model 38, and Lesche Shovels
- Hand Diggers: All Hand Diggers, Garrett Edge Digger, and Razor Edge Gator Digger
- Pinpointers: All Pinpointers, Garrett Pro Pinpointer II, and Minelab Pro-Find 25 Pinpointer
- Books: All Books and Metal Detecting Site Locators By State
